Sprinkler Head Replacement

| April 30, 2012
A Hen and a Drake Green Teal on the truck bed. Not a limit on anything, but a fun morning out.
If you have a home irrigation system, then you have probably had some sort of experience with a broken sprinkler head. A broken sprinkler head isn’t too difficult to fix, and instead of hiring an expensive landscaping pro, you can do it yourself. Broken sprinkler head replacement:

Step 1
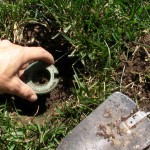
Dig out the damaged sprinkler head. Leave a few inches around the head to work with. Set aside dirt and lawn.

Step 2
Unscrew damaged sprinkler head.

Step 3
Purge any dirt, broken sprinkler components, or debris from the riser(the pipe that the sprinkler head is attached to), by running the sprinklers for a couple seconds.

Step 4
Screw on the new sprinkler head.

Step 5
Test run your sprinkler. If it runs properly. Fill in the space around the sprinkler head with the dirt or lawn patches that were removed to access the riser pipe.

Still Not Working
If the sprinkler is not functioning properly, remove the sprinkler head and try to purge the riser of any debris again(Step 3). If a major leak persists, its likely that the riser pipe is damaged. Cautiously dig deeper around the base of the sprinkler head to access the entire riser pipe. A new riser or connection elbow may be required.

Still Not Working more…
Remove any damaged parts, and take them with you in a bag to a home improvement store. Ask for assistance in finding the appropriate replacement pieces. Depending on your sprinkler system and application, the use of pvc glue, or plumbing tape, may be necessary.
| Comments

Planning A Vegetable Garden

| April 28, 2012
A Hen and a Drake Green Teal on the truck bed. Not a limit on anything, but a fun morning out.

Planning a vegetable garden is easier than you might think. Whether or not a vegetable garden is productive, depends on how well space, sunlight, nutrition, and irrigation are used. Here is our basic guide to a productive garden.

Grouping Plants
Some vegetables like

Watering and Nutrition
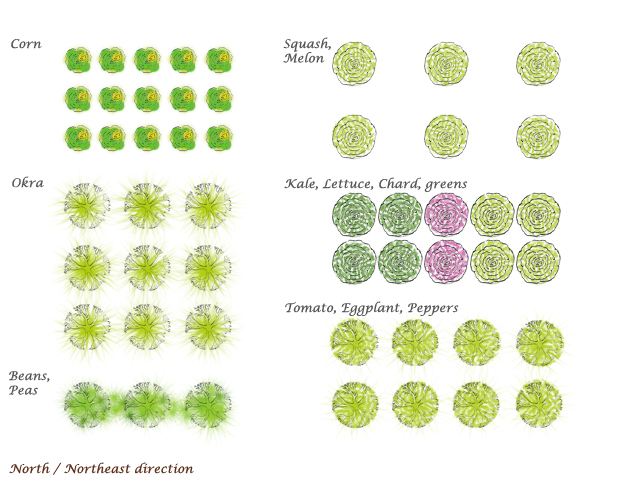
Various vegetables have different watering needs. Make garden maintenance easy, by planting similar vegetables near each other. A typical grouping would be tomatoes, snap peas, tomatillo, eggplant, and peppers in one area, while squash, melons, cucumber, and pumpkins are planted near each other in another area of the garden.

Plants with similar nutrition needs should also be grouped. Plants grouped by watering, sun, and nutrition needs, make adding fertilizer, soil amendment, or compost to the garden easy.

Space Conservation
Squash, Melons, cucumbers, peas, beans, and other vegetables sprawl. Multiple vegetables planted too closely will compete for space, sun, water, and nutrition, and ultimately be less productive than a few less, but healthier plants

Use cages, trellis, and poles, to train sprawling plants like cucumber, zucchini, squash, peas, or green beans vertically.

Sun and Shade
Plants have different sun requirements. Place taller plants at the North or Northeast end of the garden, so they don’t shade other plants. In some places, it may be possible to use the shadow cast by taller plants, to the advantage of plants that need more shade.

Tags: , | Comments

Prickly Pink Lemonade

| April 26, 2012
Photo Credit: Keith Knoxsville
A Hen and a Drake Green Teal on the truck bed. Not a limit on anything, but a fun morning out.

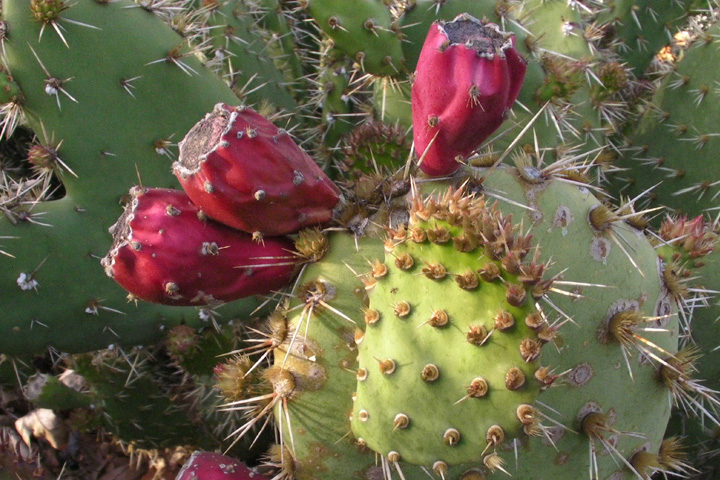
Its a tasty and colorful lemonade, spiked with the syrup of fresh prickly pear cactus fruit!We’ve given this native and abundant Southern California cactus fruit a new role as a refreshing summer drink.

Step 1
Carefully pick 3-4 four medium sized cactus fruit per desired serving of lemonade. The spines are incredibly prickly, hence the name. Be very cautious when handling. The micro sized spines on the fruit, can easily get under the skin and hurt like fiberglass. Avoid this by using heavy leather gloves, and removing spine son the fruit by rubbing over lawn or grass. It may sound primitive, but its incredible effective. Step 2
After fruit spines have been removed, wash thoroughly, the peel the thick skin off the fruit. This fruit is colorful, and it stains, so wear an apron or unwanted t-shirt when preparing the fruit.Step 3
Crush the fruit with a potato masher, then simmer the cactus fruit in a splash of water. The water helps to conduct heat and break down the cactus fruit.

Step 4
Simmer the mixture until it has broken down into a compote.

Step 5
Pour the compote through a sieve, to extract only the syrup.

Step 6
Add syrup to the lemonade of your choice.

In our example(see photos), we poured the prickly pear cactus fruit syrup over ice, topped with fresh squeezed lemonade, and then dressed it with a sprig of mint.

Enjoy the fantastic flavor and incredible color. Cheers!

Tags: , , , , , ,

Deep Water Culture

| April 25, 2012
Photo Credit: Keith Knoxsville
A Hen and a Drake Green Teal on the truck bed. Not a limit on anything, but a fun morning out.

How To: Setup a Deep Water Culture system. This basic hydroponic setup is easy, effective, and very affordable. A very simple setup can be put together for under $20. In this setup, a minimum amount of supplies are used *and I won’t show you $100 dollars of materials and say it can be done cheaper.. All, or most, of the supplies are available at home improvement stores, pet stores, or in some cases re-purposed materials from around the house. Alternatively, materials can be sourced from Ebay. For our most basic setup, you will want the following materials.

[flv:http://www.gardenisto.com/wp-content/uploads/2012/04/SANY0386.flv 624 351]

Tools
A sharp blade is the only require tool, but having a Drill, Dremel, 2″ hole saw, or Sharp Xacto knife, Scissors, Sharpie, and a ruler are all great.

Materials Required I always shop around for the best price, which is what I’ve listed. I’ve also included links to products on Amazon if you just want to purchase items quickly and aren’t being as cost sensitive.
5 Gallon Bucket ($2.50)
5 Gallon Bucket lid ($1.50)
6ft 5/16 Air Tubing ($2.00) – Buy on Amazon
10-20 Gallon(per bucket) Aquarium Air Pump ($5.00 to $16.00) – Buy on Amazon
*look at Walmart Aqua Culture: 5-15 Gallon, Single Outlet Aquarium Air Pump, 1 Ct for $6.97, or Ace Hardware Pet Supplies has a generic brand for just under $6
Air Stone/Diffuser ($1.29) – Buy on Amazon
Rock Wool ($4.95) – Buy on Amazon
4 3″ Net Pots or 6 2″ Net Pots($.30 to $.60 each) – Buy on Amazon

These Items Will Help You Increase Productivity
PH Test Kit and Conditioners – Buy on Amazon
Hydroton Grow Rocks ($6.95) – Buy on Amazon
Aquarium Check Valve ($2.00) – Buy on Amazon
Hydroponic Fertilizer ($15.00) – Buy on Amazon
Aquarium Thermometer (starting at $2.50) – Buy on Amazon

Step 1.
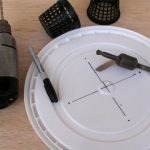
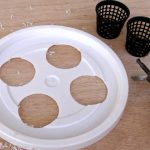
Measure and mark the holes in the bucket lid, where you will place your net pots. Net pots typically have a lip that is a greater diameter than their indicated size. This will hold the net pot in the holes you are about to make in the lid. Always double check the diameter required, or your net pots will not sit the way you anticipate. Don’t try to over crowd your pots. Four 4″ Net pots is probably going to be fine for a while, but as seedlings grow they will compete for space!

Step 2.
Cut the holes in the lid of your bucket. The easiest way is to use a drill with a hole saw, that matches your required hole size. *Always use caution when using power tools, blades, or saws.

Step 3.
Drill a hole, the same size as the outer diameter of your air tubing, in the bucket lid. Place the hole near an edge, so it will be out of the way of plant life.

Step 4.
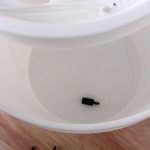
Clean, or sterilize, your bucket. Rinse thoroughly, then fill bucket to about 2.5 inches below the rim. Its easiest to fill a bucket in its final destination, but also not impossible to move if this isn’t an option. Tap water is rarely going to have a PH perfect for your plants. Testing your water, and adjusting it to a PH range of 5.5 to 6.5 may be beneficial for whatever it is you will grow. The final water level height should end up just below, or barely touching, the bottom of your net pots. After some root growth, the water level should be dropped, to provide better aeration to roots, and encourage growth. Evaporation may do this for you.

Step 5.
Insert a 3 to 4 foot length of air tubing through the small hole in the bucket lid. A length of the tubing that just reaches the bottom of the bucket should stick out the bottom of the lid. The rest of the line will run to the air pump. Attach the air stone to the length of tubing sticking out of the bottom end of the lid.

Step 6.
Firmly attach the lid to the bucket. Attach the loose end of the airline to the air pump. *Edited 5/11 – Place the air pump above the water line of your buckets to protect siphoning in the event of power failure. A one way check valve is also great protection for your air pump.

Step 7.
Be sure the environment, pump and components are dry before plugging in and/or turning the pump on. Let the air pump run overnight without plants, the bubbling will aid in the removal of chlorine.

Step 8.
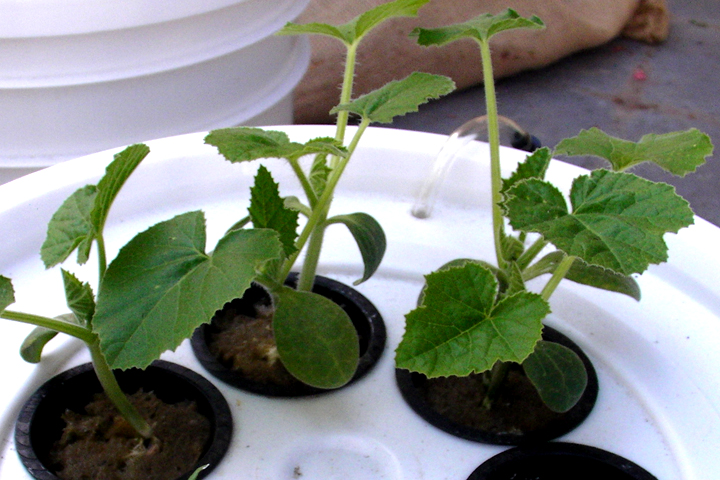
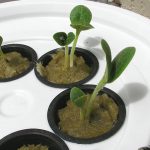
Prepare net pots, with rock wool, hydroton, or other growing medium of choice, and your seeds, or seedlings to be ‘planted’. Some growing mediums, like rock wool recommend an initial soaking in PH adjusted water. The rock wool used to start our plants is the same growing medium we use through our entire grow. Unused Rockwool from germinating seeds was used to shim and fill empty net pot space. This keeps cost on an additional growing medium down. Plant roots will eventually fill the net pots anyway.

Step 9.
Add any hydropnic fertilizers that you might choose to use to feed your plants. Double check that the PH is in the range of 5.5 to 6.5 if you can, as fertilizers can change the PH level. Insert net pots with plants. Alternative fertilizer options that are “free-ish” like, leaching old coffee grinds, dissolving eggshells with lime juice, or dissolving multivitamins and other supplements from a pantry can be used instead of commercial fertilizers, but growing results will be less predictable.

Step 10.
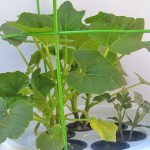
Enjoy your new Deep Water Culture System. Although starting from seed is ideal, transplanting with donor plants, or test dummies, is an okay approach to learning how to feed, and maintain your plants. Once you feel like you have a stable operation, flush the system and start anew, or setup another bucket with the seeds or seedlings you intend to grow to life expectancy. For more information on transplanting to deep water cultures, see our instructional post: Soil to Hydroponic Transplants.

Updates! Algae
If you are growing on a warm patio, algae, or other disease could effect your plants. Two reasonable methods of control are to use diluted food grade Hydrogen Peroxide, or a drop of Chlorine per gallon of water. Cooling the water temperatures, or rinsing roots and replacing water also helps.

Updates! Deep Water Culture Now an Aquaponic System!
Growth has been phenomenal, but hot weather does encourage algae growth in buckets exposed to sunlight. Fortunately, the warm conditions are also perfect for, algae eating fish. I’ve added a school of 5 chinese algae eating fish, and they are doing an exceptional job cleaning. They are also doing well in a system that has no mechanical filtration. The natural plant root filtration and heavy aeration is enough too keep a small school of them healthy thus far. Rising air bubbles actually circulate any algae debris through the root system, and mechanically filters the water.

Tags: , , , , ,

Wild Edibles

| April 19, 2012
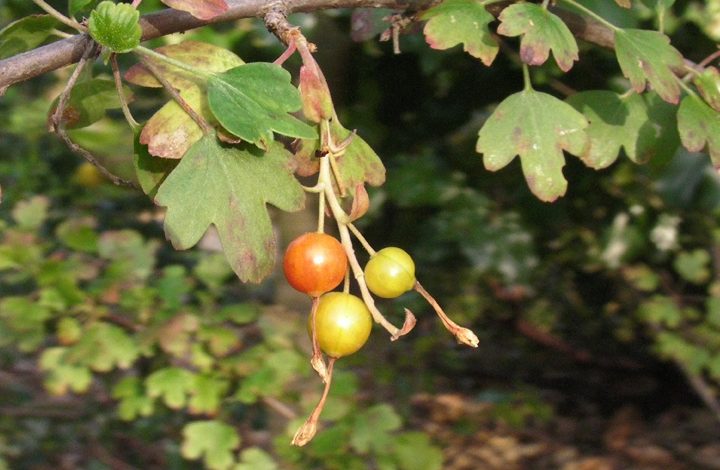
Golden Currant
Photo Credit: Keith Knoxsville
A Hen and a Drake Green Teal on the truck bed. Not a limit on anything, but a fun morning out.
Foraging for wild edibles is a fun way to add something different to your diet, whilst enjoying the great outdoors.  Many Southern California plants have either edible or have medicinal value. Here are a few plants that we like:
Golden Current– Berries are edible raw.
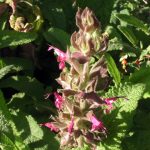
Humming Bird Sage (Salvia Spathacea) – Used by the Chumash as a naturally sweet, and comforting tea.  When poured over ice, it makes an incredibly refreshing summer drink.
Prickly Pear – Cactus fruit is edible if spines are peeled off.  Don’t be surprised by the seeds.  Large flat pads(leaf) is edible as well. Young stem segments can also be eaten.
Dandelion – The whole plant, including the root, can be eaten when young.  The older leaves can be boiled to resemble spinach. The flowers are also edible, and make an interesting tea.
Cattails – Young, round stems near the base are edible. The inside shoot can also be boiled and eaten.
Milk Thistle – The roots can be eaten raw or boiled. The flower head is similar to an artichoke. If you remove the spines off the leaves, those can be eaten either raw or boiled.
ALWAYS BE 100% SURE OF A PLANT BEFORE CONSUMING. Don’t use this exclusively as a guide. IF IN DOUBT, DO NOT EAT. Always seek professional instruction before participating in any activity describe on this site. If you notice any errors please leave a comment, or contact us.
Tags: , , | Comments

Raising Chickens

| April 17, 2012
Photo Credit: Keith Knoxsville
A Hen and a Drake Green Teal on the truck bed. Not a limit on anything, but a fun morning out.

Raising chickens can be a great way to become more self-sufficient. The most common reason why people want backyard chickens is for the fresh eggs. But besides having fresh eggs every morning, there are many other reasons to raise a flock of your own. Chickens are easy and fairly inexpensive to raise, and you’d be surprised to find out that they are friendly pets with lots of personality. Chickens produce some of the best fertilizer and are always willing to help provide chemical free bug and weed control.

Chickens have a group mentality and are very sociable, so plan to have at least 2-3 birds in your flock.  You should always check with your city’s law and ordinances before getting chickens.  Most local feed stores will have day old chicks in the spring time, or you can purchase eggs online to hatch on your own.

The first 60 days of a chick’s life are very important. You must be dedicated to keeping a clean and safe home for the chicks until they are ready to be put into a coop.  The more time you spend playing with the chicks, the friendlier they will be towards people. Letting your chicks explore the outside is also very important, just make sure they are constantly supervised as they are an easy prey. A few staple items are needed:

  • A young chick broader- A cardboard box works great, just make sure you get a bigger box when the chicks start growing (This happens quick!)
  • Flooring-  Shredded newspaper is easy. This must be changed frequently, never allow it to become too wet.
  • Temperature- 90-100 degrees the first week, decreases 5 degrees each week. A 100 watt bulb pointing in one corner of the box works well.
  • Food and water- Chicks need a starter feed or mash for the first 6-8 weeks.  Plenty of fresh water is also required.

After the first 60 days, general care of your chickens is pretty straight forward. Once your chickens get their feathers they are ready to be moved outside.  The design of your coop will vary depending on what you plan on doing with your chickens. Plan on having at least 2-3 square feet per chicken inside your coop.  You will also want to make sure the coop is protected from both predators and the elements.  If you are raising your chickens for eggs, you will want to make sure you are feeding them a laying blend of scratch or pellets and that they get their veggies too! Chickens love garden scraps, breads, and don’t forget the bugs! Most chickens can also lay around 4-6 eggs a week.

Chickens are such unique birds with personalities and amusing antics that will be sure to make you laugh. They offer you a wonderful “pets with benefits” experience, from fresh eggs to help in your gardens.


Tags: , , , , | Comments

Organic Pest Control

| April 17, 2012
Photo Credit: Keith Knoxsville
A Hen and a Drake Green Teal on the truck bed. Not a limit on anything, but a fun morning out.

No garden is perfect, or at least it doesn’t get that way without some occasional trouble caused by weather, nutrition, or pests. This article focuses on the latter, common garden pests, and how to control pests organically. Check out the common pests below, and our recommendations.

Most Small Insects
Most small insects will get consumed by larger predatory insects. The most beneficial, is probably the mantis. Hatching a mantis egg sack inside your garden can help prevent future pests, as well as take care of smaller ones.

Snails and Slugs
Copper tape. Copper creates an electrically charged barrier that repels slugs and snails, and works when wet.
Corry’s Slug and Snail Copper Tape Barier

Extracts, Oils, Acids, Salts. Organic options made from extracts, oils, acids, and salts repel and kill snails, slugs, silverfish, and other insects.
Monterey All Natural Snail and Slug Spray RTU

Ants, Aphids, Bagworms, Borers, Beetles, Caterpillars, Codling Moth, Gypsy Moth, Loopers, Leaf Miners, spider mites, Tent Caterpillars, Thrips, White Flies, Earwigs, Grasshoppers, Lace Bugs, Mealy Bugs, other larvae

Spinosad. What is Spinosad? Spinosad is a naturally occurring bacterium that has become a leading organic pesticide globally.
Captain Jack’s Dead Bug Brew

Insecticidal Soap
Ortho Elementals Insecticidal Soap

Preventative strategies
Why treat a problem when you can avoid it altogether? Try adding plants that dissuade pest insects from your garden.

Planting Garlic, Onion, Peppermint, and Marigolds in your garden can be effective in repelling beetles, ants, aphids, and other common insects.

Tags: , , , , | Comments

IncrEdible Color

| April 13, 2012
Photo Credit: Keith Knoxsville
A Hen and a Drake Green Teal on the truck bed. Not a limit on anything, but a fun morning out.

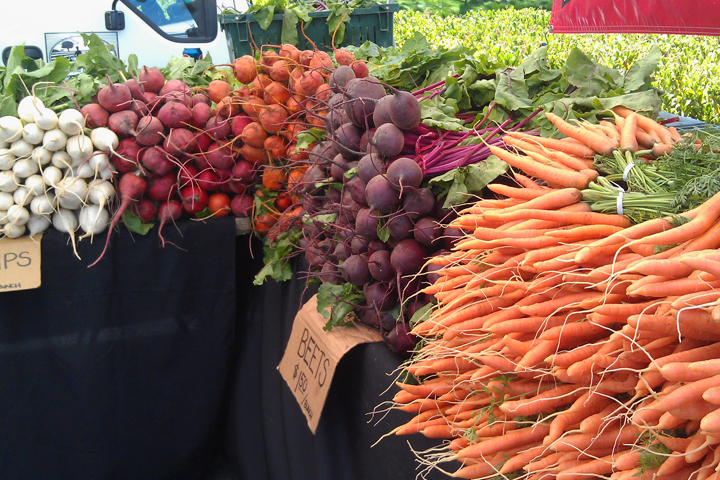
Garden vegetables don’t have to be green and boring.  The right selection of plants can produce vibrant edible color.  Check out our suggestions for some fresh ideas on colorful veggie fare.

Famrers Market

Amaranth: (Amaranthus Caudatus,generically known as Love Lies Bleeding pictured on homepage) Amaranth is a flower ranging from gold to red to purple, with edible leaves and seeds.  The seeds are also a gluten free psuedograin.

Beans: Purple Podded Pole Bean, Swiss Heirloom, Velour Dwarf Purple French Bean Bush, Homer Nelson Family Pink Tip Half Runner Bean, Mosaic Yard Long Bean, Swiss Landfrauen, Purple Italian Marconi Stringless, Cascade Giant Pole Snap Bean, Cosse Violette Pole Bean.

Cabbage: Purple Cabbage, Red Cabbage

Carrots: Selective breeding can produce a plethora of carrot colors

Purple Carrots

Chard: Chard is available in a variety of colors, ranging from yellow, to orange, red, and purple. It’s aesthetic both in the garden, and on a plate.

Corn: White, Silver, Bicolor, Ruby, Pink Blue, Red, Black, and Streaked.  The hybrids and varieties are nearly endless.

Garlic: Heirloom Garlic has a white with a purple ombre

Kale: Purple Kale

Lettuce: Red Leaf, Red Frilled, Belgium Endive

Okra: Red and Burgundy Varieties

Peppers: Bell Peppers, Pri Pri, Thai, Tabasco, Habanero, Cubanelle, Scotch Bonnet, Datil

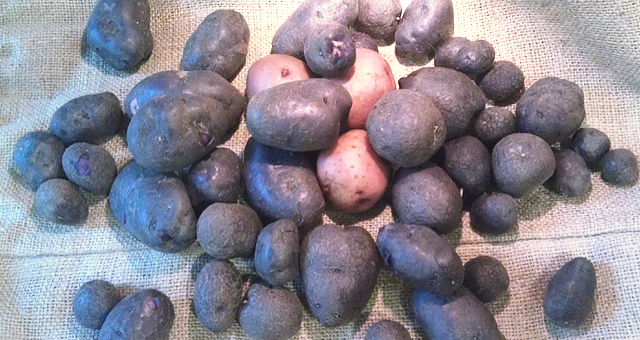
Potato: Rasalind, Blue Swede, redskin

Radish: A lot of varieties offer different shades of color, and slice patterns. Interesting varieties include: Bunny Tail, Plum Purple, Watermelon, and Daikon.

Squash: Yellow Summer Squash, Yellow Crookneck.

Tomatoes: Yeah, we know! Botanically they ARE fruits, but we usually treat them like veggies so they make our list.  Tomatoes exist in a lot of hybrid, heirloom, and modified varieties.  They introduce bright colors, unique shapes, and a range of sizes into your garden fare.  Looking for a more unique or aesthetic variety?  Try and find some Black Sea Man, Snow White Cherry, Yellow Pear, Ida Gold, Black Krim, or Garden Peach.

Tags: , , , | Comments

Tater Box

| April 7, 2012
Photo Credit: Keith Knoxsville
A Hen and a Drake Green Teal on the truck bed. Not a limit on anything, but a fun morning out.

Easily produce 50 pounds or more, of potatoes in 4 square feet of gardening. The concept is fairly basic. Potatoes produce shoots off of their main root system as the plant grows vertically. Those shoots terminate in a potato.

Every half foot or so of plant growth, cover the potato plant, leaving only a little plant to continue to grow above the surface. The dirt forces the potato plant to grow upwards, as well as no shoots to produce more potatoes.

All you need are potatoes, preferably seed potatoes, and 6 to 8 inch panels of wood in a minimum of 2 foot lengths.

I used 4 foot lengths of ½” by 6” pine, that I cut into 2 foot lengths, and some small penny nails. I am not building the prettiest box, nor am I building the most durable one, so consider making serious improvements for durability.

However, I like to repurpose construction materials when available. Observational research has shown that construction waste can be as high as 10 to 15 percent of the materials that go into a building. So if a broken pallet were available, I’d happily repurpose that.

Nail together the four sides of the box, and set on a level part of your garden where the box can irrigate from the bottom when needed.

Allow your seed potatoes to sprout in a tray prior to planting.

Add a light layer of gravel or wood chip to the bottom of your box to allow it to irrigate. Add a shallow layer of garden soil as the base for your potatoes.

Place your sprouted spuds on the bed of soil with the sprouted plant at the top. Keep them as evenly spaced as possible, and try not to overcrowd them. Cover the entire potatoes, leaving only a tiny bit of each plant exposed above ground.

Monitor plant growth, and water as necessary. Cover the plant at about 8 inch intervals leaving some of the plant exposed. Frame and stack additional levels of the box as necessary to promote plant growth.

*Updates
4 Weeks – At 4 weeks after planting, a new 6 inch level of planter box was added, and compost filled up and around the potato plants. Only the tops of the potato plants were were left exposed above ground to continue upward growth. The update photos are shown in the article.

Tags: , , | Comments

A Dirt Cheap Planter Box

| April 4, 2012
Photo Credit: Keith Knoxsville
A Hen and a Drake Green Teal on the truck bed. Not a limit on anything, but a fun morning out.

You don’t have to have a huge planter box to benefit from a raised bed style of gardening.

In a fantasy world we’d take the truck, not our everyday commuter, to the home improvement store, and buy upwards of 150 dollars worth of lumber, for a brand new garden box, that we plan on putting on the unused acre of space in our back yard.

While that sounds awesome, it’s not everyone’s reality. It also doesn’t need to be, to reap the benefits of a raised box garden.

I reclaimed a 12 foot 2×8 from a home improvement project, and repurposed it for a small garden box. Specifically, I built mine to improve the soil and irrigation for lettuce, and it just so happens to work very well.

I used a hand saw and cut two 4 foot lengths and two 15 inch lengths out of my reclaimed beam. For durability sake, I’d recommended that you use long wood or decking screws. However, I only need mine to last a single season. I’ll be moving my entire garden to another part of the yard, so I used 3 ½ inch framing nails I had in the garage, which work just fine

After cutting and framing, I grated the dirt under the target location of my box with a shovel until the area was level. I filled the box with a mixture of my own compost, and a half used bag of store bought garden soil.

While my box is pretty basic, narrow and shallow by most standards, and it lacks stakes to support side walls, I actually get two rows of healthy great lakes lettuce comfortably growing in my box. Even better! It took less than half an hour of my time, and an out of pocket cost of Nothing!

Tags: , , | Comments