The Gardenisto

The Gardenisto is passionate about aquaponics, hydroponics, horticulture, and traditional gardening. The Gardenisto shares his knowledge to help other enthusiasts in their own gardening endeavors.

DIY Hydroponic System with Lighting $30

| November 13, 2013
Photo Credit: Keith Knoxsville
A Hen and a Drake Green Teal on the truck bed. Not a limit on anything, but a fun morning out.
A friend living in a small town in Wyoming presented a challenge to me. Build a garden, indoors, in a very limited space, with no natural light, that is low cost, and low maintenance.

In case you are wondering why it is worth the effort to build such a small garden system, then consider the break-even point. Gardenisto is Southern California based, and our primary contributors don’t really experience this sort of problem, but depending on where you live in the country, some food items are ridiculously expensive, if you can find them at all.

In the location we are building this system, a small bruised or frost damaged, bunch of ‘fresh’ Basil can run just under 4 dollars. So the goal is to build a garden, capable of yielding enough Basil, Mint, Pak Choy, or other micro greens, to break even. The target system cost is 30 dollars, or 7.5 small bunches of Basil.

The Garden System Options
Container or pots and containers with soil for hand watering
Drip System with soil
Drip System with soil alternative, like perlite, Hydroton, or Rockwool
Deep Water Culture
Flood Drain or Ebb Flow
Wick System
Nutrient Film System or Technique(NFS a.k.a NFT)

The Choice and Reasoning Why
The idea is to create a small garden system with artificial light, capable of growing at minimum of two bunches of Basil, two bunches of mint, and two bunches of pak choy.

Soil is a gateway to unwanted pathogens, insects like fungus gnats, contamination and weeds. Without active care this can destroy plants. Soil systems also need active monitoring and watering either by hand or timers and sensors. This defeats the idea of low or zero maintenance.

Drip systems, ebb flow or flood drain, and nutrient film technique(NFT) solutions require an aerated reservoir, the added complication of a water pumps, and a timers to run the systems. Working out volume and frequency of watering also isn’t for the novice. Should any of the Drip, Flood Drain, or NFT systems fail or need re-calibration, a novice hydroponic gardener will not easily be able to fix it.

NFTs also generally require a larger foot print, and some sort of elevated or tower construction to hold various sizes of plumbing.

In a deep water culture system, an air pump, which is on all the time, is the only expense and technical component, besides lighting. DWCs are easy to maintain, require little to no equipment or technical knowledge, and can be very compact.

So the build will be a DWC, for 6 small plants, that fits within a foot print of 18” by 18”, with an artificial light source.

Tools
We are away from home on this one, so we are limited in terms of tools available.
Scissor, Exacto Knife, Pocket Knife with some survival accessories

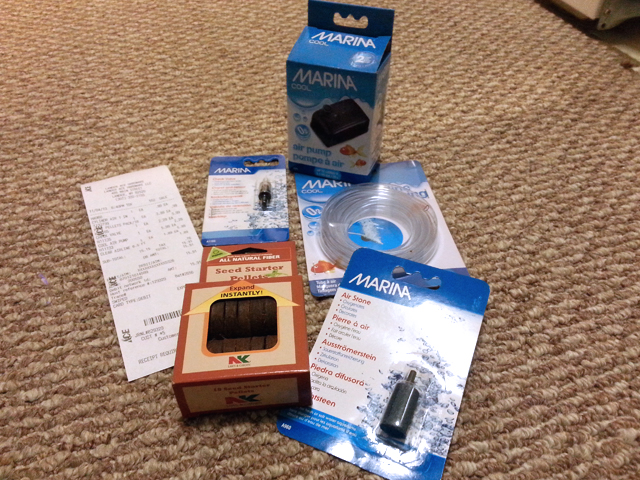
Possible Equipment List Ideas, and Actual Purchases
Lamp
– HDX 150-Watt Incandescent Clamp Light @ Home Depot $8.97
– Brooder style Lamp with Clamp – @ Walmart $6.79 (Actual)

Bulb
– Feit Electric 13W Daylight (5000K) CFL Light Bulb – $6.22 @ Walmart
– GE® Spiral Daylight CFL Bulb – $6.99 @ Ace Hardware
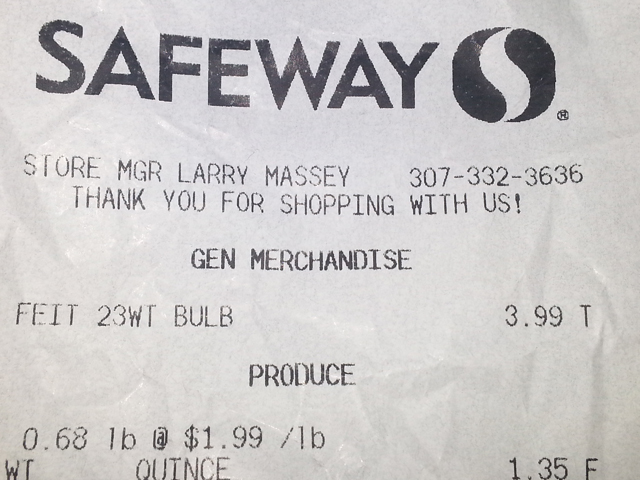
– 23w FEIT Daylight Bulb – 6.00 @ Safeway $3.99(Actual)

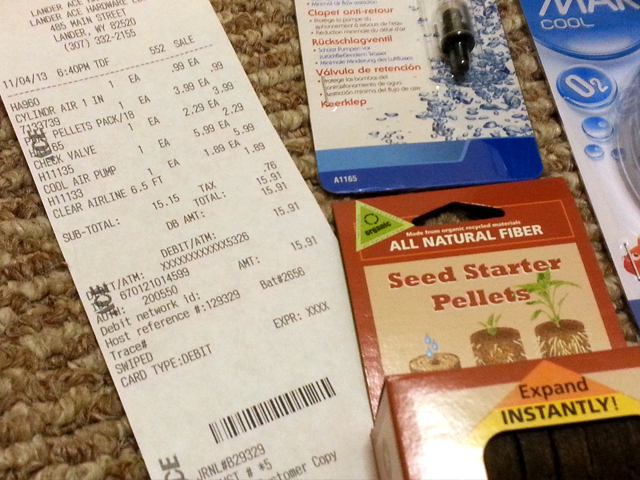
Fish Tank Air Pump – $6.00 @ Ace Hardware $5.99(Actual)
Anti-Siphon Valve – $2.00 @ Ace Hardware $2.29(Actual)
6x 2” net pots – $2.40 @ Ebay $2.40(Actual)
Bucket 5gal – @ Home Depot $2.78(Actual)
Bucket Lid – @ Home Depot $1.98(Actual)
Air Stone @ Ace Hardware $.99(Actual)

Growing Medium – Free @ Trash Cans Everywhere
– Wine corks
– Cork board
– Plastic Cups and Bottles (PU Chips)
– Coco Peat Starter Plugs @ Ace Hardware $3.99(Actual)

Total: 31.38 (6.97+3.99+5.99+2.29+2.40+2.78+1.98+.99+3.99)

Setup Instructions
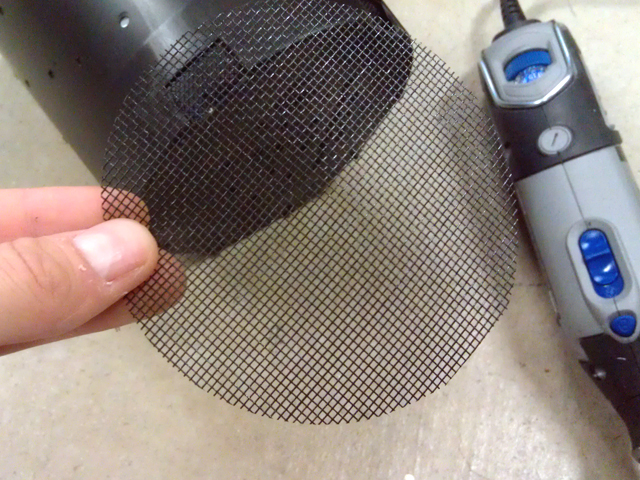
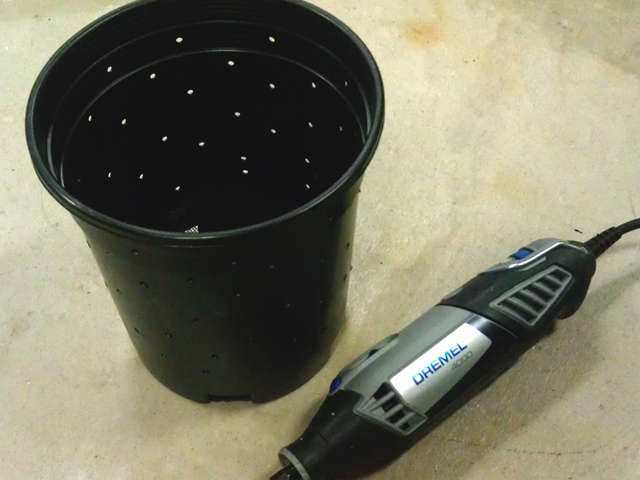
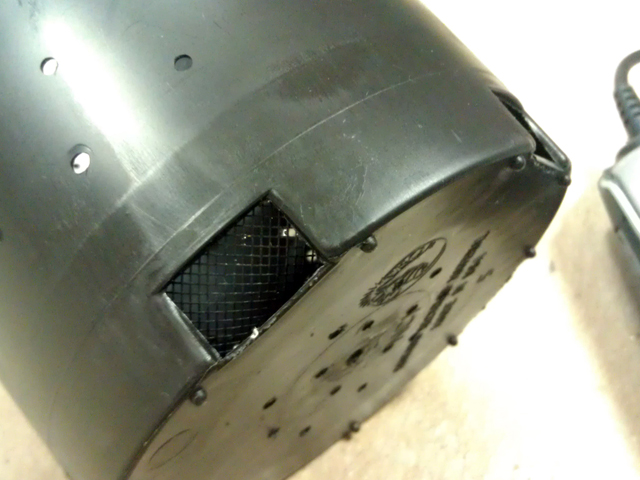
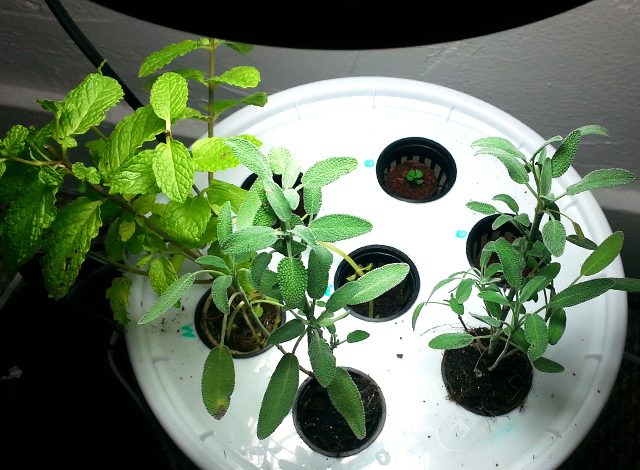
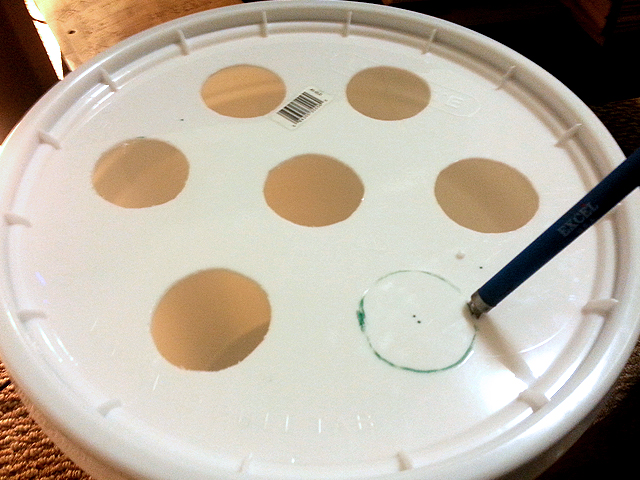
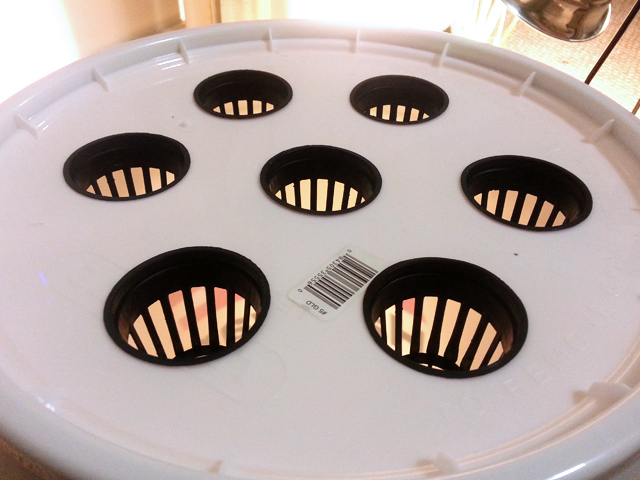
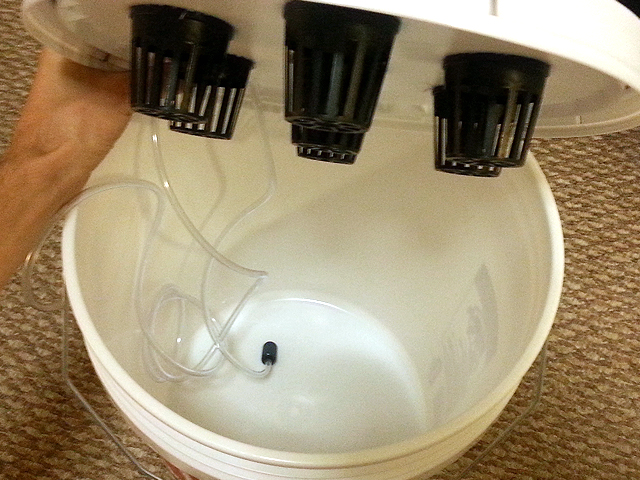
Setting up a 5 Gallon bucket DWC is quite simple. Preferably, we’d have a 2″ hole saw, but we didn’t. So we marked holes for our net pots and very carefully and painstakingly, cut out and trimmed up holes for our net pots with an xacto blade. We also made a hole for our air line to run into the bucket. The rest of these instruction are a bit abbreviated, so for more complete instructions on a DWC setup see our post on just that: Deep Water Culture Basic Setup

apartment_hydro_002

small_hydro_01

small_hydro_02

small_hydro_03

small_hydro_04

small_hydro_05

small_hydro_06

small_hydro_07

small_hydro_08

After cutting net pot holes and an airline hole in our bucket lid, we ran airline through the hole, and attached an airstone on the underside of the lid. On the outside of the bucket we attached the air pump. We then cut the airline about 18 inches away from the pump, but before the bucket lid, and inserted a one way check valve. The one way check valve is to prevent back siphoning.

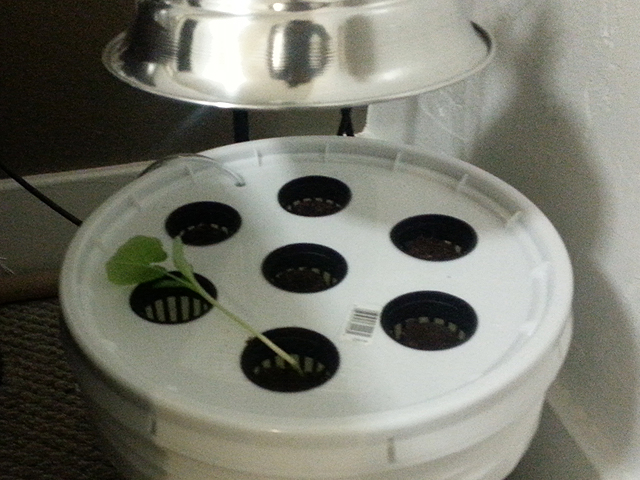
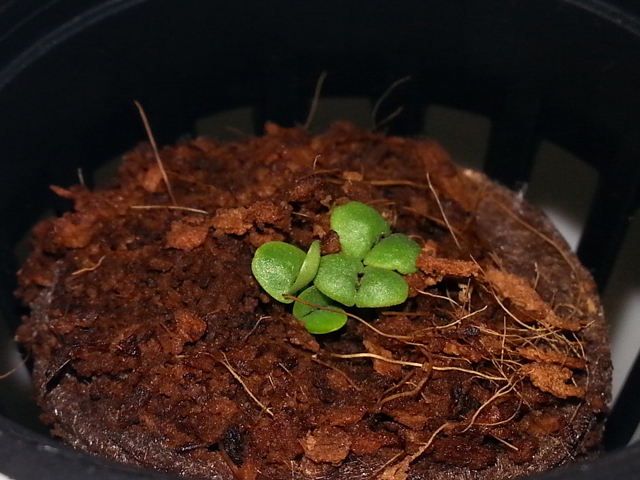
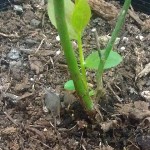
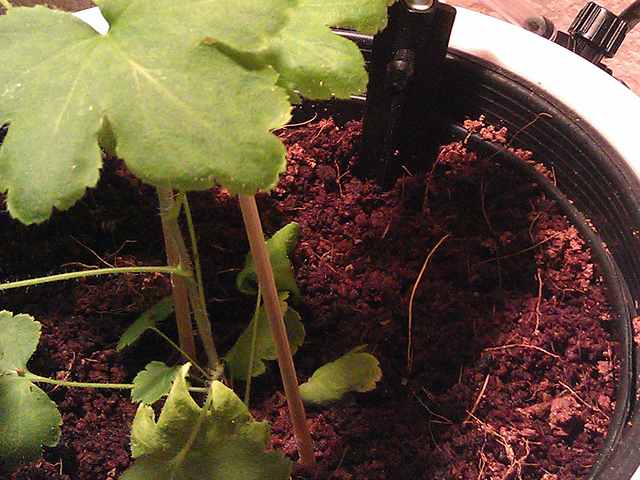
The remaining steps are quite easy. Fill Bucket with water. Attach Lid. Insert net pots and starter plugs with whatever herb seeds will be grown. Screw the light bulb into the lamp. Notice we used a 6500k Daylight Bulb, this provides the necessary color spectrum for healthy plants. Clamp the lamp above the bucket lid at an appropriate height, around 4 to 8 inches. Make sure everything is dry, and no wiring is in any sort of contact with water.

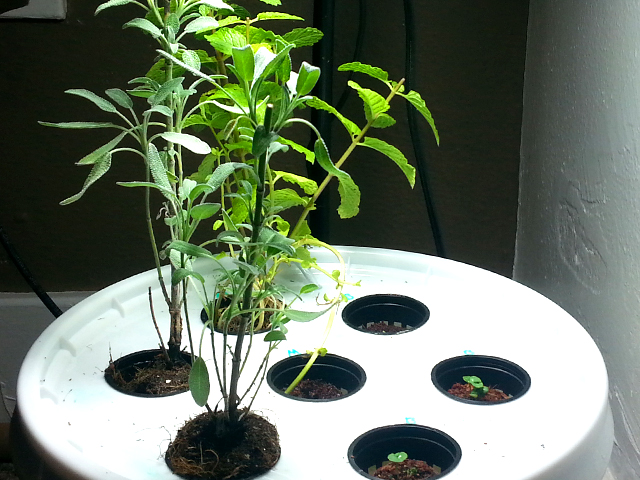
Finally, plug and play! Now we have a compact hydroponic herb garden, with enough lighting to grow bunches of basil, micro greens, other herbs, or compact leafy greens. Please leave us your questions or comments if you have any.

Tags: , , , | Comments

Pruning and Propagation

| September 29, 2013
Proper Pruning
Photo Credit: Keith Knoxsville
A Hen and a Drake Green Teal on the truck bed. Not a limit on anything, but a fun morning out.

Pruning is an important aid in controlling overgrowth, shaping plants, improved fruit yields, and promoting new growth. Pruning, when done correctly, will heal quickly and promote new growth at the nearest node or bud. Another benefit of pruning is my personal favorite. Pruning supplies cuttings from which one can more quickly and easily propagate identical plants.

Pruning requirements aren’t the same across all plants. Fruit bushes often require knowing the age of branches. In the case of currants, the best producers of currant berries are the two to three year old branches. Older branches, 5 years or more, typically serve as a branching limb for new limbs, or should be removed near the base.

For Dragon Fruit, the 2nd year and third year limbs are also the producers of fruit. Afterwards, they can be removed to promote newer growth, and or to maintain a plants shape and manageability. Dragon Fruit, and many of the Pitaya hybrids, can easily be grown from cuttings.

Growing from these cuttings will reduce the amount of time it takes to begin producing fruit. Starting from seed often means at least a two year period, before producing fruit. It will also likely be the first time you could determine if your seed was true seed, or if it had been cross pollinated, producing a less desirable plant than the parent or mother plant.

Because propagating plants from cuttings is faster than from seed, and the clones will be identical to the mother plant, most commercial growers, including marijuana growers, use cuttings as a primary method of propagation. Less easy and practical for the home grower, but commercially applicable, is micro propagation through cell tissue culture. I’ve personally experimented with mixed results, and will eventually post specifically about that method in separate post.

If you plan ahead, and know you will be removing a limb, perhaps a low growing one, ground layering could be a good option for propagation. If the limb is higher, then air layering may be a good bet.

Layering gives a plant the opportunity to root, prior to being removed from a parent plant, and drastically improves survivability once transplanted.

Tags: , , , | Comments

Heirloom Tomato Varieties

| July 15, 2013
Photo Credit: Keith Knoxsville
A Hen and a Drake Green Teal on the truck bed. Not a limit on anything, but a fun morning out.

indigo rose tomatoPink Boar TomatoYellow Pear TomatoTomato Varieties 2Tomato Varieties 1

If you have ever tried the iconic ‘heirloom’ tomato, you may have noticed an improvement in flavor over the run of the mill Roma or Beefsteaks normally available in the supermarket.

Fortunately many heirloom varieties of tomatoes are very easy to grow in your home garden. Experiment and pick varieties you’ve never tried or never even heard of. Here is a start, Pink Boar, Indigo Rose, Black Prince, Cherokee Purple, Rose, Dixie Gold, Black Krim, Yellow Pear, Black Cherry, Purple Plum, Green Zebra, German Green, Currant, Blondkopfchen.

The Gardenisto garden produced 9 varieties of tomatoes this year. Two of those varieties were favorites from last year; Black Cherry and Yellow Pear. While nine varieties may seem like a lot, it feels as though we have barely scratched the surface. Every year we continue to experiment and pick new favorites, and you can too.

Do a web search for some of the tomato varieties mentioned, check out our vendor reviews for reputable sellers, or leave us a comment if you are interested in any recommendations. We’d be happy to share the knowledge we’ve gained by growing different varieties of tomatoes, season after season.

While tomatoes are fairly easy to start from seed, if you need pointers or have difficult seeds to start, then refer to our seed starting guide.

Tags: , , | Comments

Purslane, Verdolagas, Pigweed

| April 14, 2013
Photo Credit: Keith Knoxsville
A Hen and a Drake Green Teal on the truck bed. Not a limit on anything, but a fun morning out.

Purslane VerdolagasA lot of the summers of my youth were spent in Mexico, on my grandparents ranching lands. I learned all about the local vegetation and agriculture, before many companies like Driscoll’s entered the small agricultural communities to expand their berry growing endeavors with cheaper Mexican property and labor.

Anyways, I spent some days picking odd fruits off of trees, Choyote off of vines, Pitayas off of cacti, Mexican Cucumbers from wild low lying vines, and various other edible pants from fields and vegetation.

I have a lot of memories scavenging for Verdolagas, which I was quite fond of. Fast forward a couple decades to the beginning of last year, when I decided I’d like to grow some Verdolagas. I asked Grandma Google for “Verdolaga Seeds” and quickly got some suggestions for an English name: Purslane, Pigweed, Portulaca Oleracea.

I did a little more searching and reading, and was shocked when I read that this delicious little gift from the plant gods was often considered and exotic weed. “Whatever!” I thought to myself, “the world just doesn’t know what they are missing”. I scavenged local areas, and found the tasty little weed growing out of sidewalks and poorly maintained yards, but unsure of the chemical treatment those weeds had likely received, I decided to find a plant or seeds online.

It wasn’t more than a week or two later that I saw Purslane greens at the local farmers market, but they were chopped greens, and weren’t viable to plant. And then came the media bomb! Dr. Oz did a segment on super foods, in which he talked about the benefits of Purslane.

My beloved little weed was all of the sudden, a mainstream super food. Even the price of the limp Purslane Greens at the farmers market had instantly skyrocketed.

I did eventually get a hold of some good organic seed, so we now have some healthy Purslane growing at Gardenisto.

Call it what you want: super food, exotic weed, Verdolagas, Pigweed, or Purslane. With the endorsement of Dr. Oz on my side, if you haven’t tried this delectable little weed, give it a shot.

Tags: , , | Comments

Lychee Leaf Growth

| April 12, 2013
Photo Credit: Keith Knoxsville
A Hen and a Drake Green Teal on the truck bed. Not a limit on anything, but a fun morning out.

Lychee Leaf GrowthWe potted our lychees air layers in a blend, of coco, peat, bark, and perlite, with some organic starter nutrients and plenty of beneficial bacteria. It took time to grasp the needs of our little lychee air layers. They lived indoors under artificial lighting through the winter, protected from wind and cold. We watered and fed them with our Arduino controlled drip system. They finally took root, and began to thrive, but not without issue.

We learned the hard way just how sensitive our lychees were to both, over fertilization, and the salts in our hydroponic nutrient blend. The older leaves eventually started looking chlorotic, and the plants dropped a lot of their leaves.

So you can imagine our excitement when our little lychees were growing new green stems and budding out. A few weeks later, the plant still dropping leaves from previously having been over fertilized, we realized our new growth was all floral. We went back into panic mode. The flowers were beautiful, and dense enough that some properly pollinated. Small fruit started to grow, so we trimmed them all off, fearful the plant would partially fruit, then run out of energy, and die.

The weather warmed up, and the lychees still dropping leaves with no new leaf growth, were moved out side into an area built to protect from wind. They were slowly hardened off, and eventually moved into direct sunlight.

Only a couple weeks after the flush of flower buds had finished, a new flush of buds began growing at the base of new growth, as well as on older growth. Days of monitoring anxiously, finally revealed these new buds were indeed new leaves.

So what had happened?
Basically, we over fertilized, and stunted our plant, the wrong balance of fertilizer may have also promoted a flush of flowers, but we are pretty sure the flush type was mostly dependent on temperatures.

How do you promote green growth?
Heat! When the plant was moved into bright, warm, full sun, the soil temperature climbed. Warmer soil promotes flushes of leaves.

How do you promote flowering?
Colder Temperatures. Lychees don’t like to be too cold, but below a specific soil temperature, lychees like a lot of plants, will set fruit instead of leaves.

If we try growing Lychee from air layers during the winter again, we’ll take a slightly different approach. We will definitely reduce the nutrients in our water reservoir, but we’ll also add some heaters, and add a heating mat to raise the soil temperatures.

We’ve learned a lot about Lychee growing in the last year, so let us know if you have any comments or questions. We’d love to help you out if we can.

Tags: , , | Comments

Extreme Pot Drainage

| February 9, 2013
Extreme Pot Drainage
Photo Credit: Keith Knoxsville
A Hen and a Drake Green Teal on the truck bed. Not a limit on anything, but a fun morning out.

Hydroponic Drip Pot DrainageProper drainage is critical to plant health. Different plant types require different levels of moisture retention, aeration and drainage in their respective growing medium, but container gardening adds another challenge.

Many gardeners struggle with plants in containers because of inadequate drainage. Plants cycle from being neglected and needing water, to being drowned by over watering. Besides suffocating a plant, over watering often leads to disease, unrecoverable wilt, leaf loss, and the eventual death of a plant.

Hydroponic Drip Pot Drainage 2So when we decided to grow drought tolerant plants, in a hydroponic drip system, we needed to change the drainage properties of the containers we had.

Our basic low water usage growing medium is a 92% perlite, 8% coco fiber mix. To keep the mix from washing out of the containers, we used food grade silicon to secure a nylon mesh over larger drainage holes.

We then used a Dremel with a drill bit attachment, and systematically perforated 1/8 inch holes evenly around the pot. We drilled additional holes evenly spaced between existing holes, adding more toward the bottom than the top.

Hydroponic Drip Pot Drainage 3We want extreme drainage, but we still want the water to run down past the root system and saturate the coco fiber near the root mass, so we avoided adding too many holes near the top that would allow water to run outwards instead of downwards. We also drilled supplemental drainage holes on the bottom side of the pot.

There are a lot of pots out there. Some of them probably do what our DIY extreme drainage pot does, but this works perfectly for us. With improved drainage, proper nutrition, and an adjusted watering cycle, a plant best suited for a chaparral or desert can be grown in a container or hydroponically.

Tags: , , | Comments

Sterile Soil vs Living Soil

| January 23, 2013
Photo Credit: Keith Knoxsville
A Hen and a Drake Green Teal on the truck bed. Not a limit on anything, but a fun morning out.

Healthy SoilThere are two major schools of thought on soil; Sterile or Living. We’ve outlined the benefits and drawbacks to both.

Sterile Soils
Pros:
Sterile soils are treated or pasteurized to sterilize any viable seeds and fungal spores.
Cons:
Sterile soils are often contaminated during storage and handling.
Contaminated soil has no natural defense against unwanted organisms or pests, and requires additional treatment.

Living Soils
Pros:
Living soils contain beneficial bacteria that promote plant health and vigor
Living soils contain nitrogen fixing bacteria that can improve soil.
Cons:
Living soils can contain unwanted bacteria, as well as fungal spores and seeds.

It’s important to note that once exposed, either soil is susceptible to fungus nats, and infection by other pests.

So which is better?
We care less about the soil type that you start with, than we do a proper nutrient balance, moisture holding characteristics, aeration, PH, and a healthy rhizosphere. Unless we are using something like rockwool, clay balls, or perlite as a growing medium, we always inoculate our growing medium with beneficial bacteria.

If you are curious about beneficial bacteria, and the rhizosphere in general, then check out our post on mycorrhizal bacteria.

Tags: , , | Comments

Grow Light Basics

| December 23, 2012
Photo Credit: Keith Knoxsville
A Hen and a Drake Green Teal on the truck bed. Not a limit on anything, but a fun morning out.

indoor shop grow lightThere are a couple common misconceptions about growing plants indoors with artificial lighting, but growing plants under lights indoors doesn’t have to be a technical or expensive endeavor. Cover/Feature photo: Pink Lemonade Blueberries Under Indoor Grow Lights, Gardenisto © 2012; Photo Left: Golden Currants under T8 Lights © 2012; Bottom Left:Pink Lemonade Blueberries under T8s © 2012.

The first common misconception is that special and expensive light bulbs are required for growing indoors. The truth is you do not need special or expensive lighting. A common 4 foot T8 shop light fixture can be purchased from your local hardware or home improvement shop for about $20, and will be suitable for growing small plants. The bulb also does not have to be special. However, it does need to be selected carefully from all the options you will have at the hardware shop.

pink lemonade blueberriesMany fluorescent T8 light bulbs won’t do much for your plants. Plants use blue wavelengths of light for green growth and red wavelengths for flowering. Without getting too technical, red is at the bottom of the light spectrum, and blue is at the top end.

Light bulbs have a light/color spectrum rated in Kelvin. Most light bulbs in the hardware shop will have a ‘cool white’ output in the middle of the spectrum at 3500k to 4100k, but what you need for healthy plants is at the higher and lower ends of the spectrum.

Look at the bulb packages and find a 6500K bulb. This will provide the full light spectrum, including blue light that plants need. Common T8 Light fixtures hold 2 to 4 bulbs, so if you are interested in getting your plants to flower you can use a bulb with a K rating of 3000 or less, in conjunction with a 6500k bulb.

This brings us to the final misconception on costs. A two bulb T8 shop light fixture costs 20 dollars, and a two pack of T8 fluorescent light bulbs costs less than 8 dollars. The total equipment cost for a small growing space is about 28 dollars. Get fancy and add a mechanical timer for 4 bucks, and you have yourself an automated system.

So what about the electrical bill? Your electrical bill is not going to sky rocket. A rough estimate of the operational cost of a two bulb T8 light fixture, running 16 hours a day, is between 4 and 8 dollars a month. Annually that’s a cost of no less than 48 dollars, and no more than 96 dollars per year. Your actual cost will be based on your kilowatt/hr rate, which you can find in your electrical bill.

Tags: , , , | Comments

Winter Gardens

| December 15, 2012
Photo Credit: Keith Knoxsville
A Hen and a Drake Green Teal on the truck bed. Not a limit on anything, but a fun morning out.

Hydroponics with a winter crop of KaleYou don’t have to wait until spring to have a healthy and productive garden. The weather in your area might actually be perfect for leafy greens, root crops, and herbs.

Kale, Cabbage, Collard Greens, Carrots, Beets, Radish, Turnips, Kohlibri, Swiss Chard, Parsely, Spinach, and various herbs all have a place in a winter garden.

If you live in a warmer climate it is possible to grow potatoes in raised planter beds. The raised beds, tote boxes, or even tires, as well as planting mediums like straw provide some insulation, and allow potatoes to thrive through cold spells.

Our winter gardens are often a combination of leafy greens, root crops, potato boxes, and whatever we can continue to produce beyond fall. We are fortunate enough, within our microclimate in Southern California, to produce both tomatoes and corn into December.

Potato Boxes can Survive WinterIn some zones it may be unrealistic to produce anything outdoors very well. Of course there are hydroponics and indoor growing alternatives, and mini-greenhouses, but it could just be a great opportunity to fix nitrogen with a cover crop or let fall leaves compost and enrich your soil.

If you waited until December to take action on a cover crop, you may be too late. You could try and get a late start on Field Peas, Winter Wheat, Ryegrass, Oats, or Clover, but you may not get them going as you might have in September, October, or even November.

If you get your winter cover crop growing, be sure to mow down or top plants before they go to seed, or you will end up competing with your cover crops as they germinate in spring. We till our soil, and try and let the soil sit for at least a week before planting or sowing seed.

While there are some proponents of no-till techniques that you can experiment with, we have always had great success tilling cover crops and fall compost into our soil, so we are sticking to it.

Tags: , , | Comments

Growing in Coco Coir: Getting Started

| December 9, 2012
Coco Mix
Photo Credit: Keith Knoxsville
A Hen and a Drake Green Teal on the truck bed. Not a limit on anything, but a fun morning out.

Coco Coir is an increasingly popular growing medium in hydroponics, and is generally considered to be a more sustainable and eco friendly replacement to peat.

This article isn’t meant to start a raging debate about which growing medium or method is best. It is intended to help those interested in using coco coir get started with it as a growing medium.

So raging debates aside, a 60/40 or 50/50 mix of coco coir to Perlite is the preferred growing medium at Gardenisto.

Very specifically, we like the coco coir products that contain a blend of coco fiber, dust and chunks. The blend creates a soil like medium that is clean and familiar to work with.

While coco coir can be used as a growing medium on its own, it acts too much like a sponge, and in most of our applications plants have done better when Perlite is mixed in.

Perlite adds aeration to the mix, and improves drainage. Without the Perlite in the mix, it is difficult to tell if coco coir is saturated. The growing medium can look and feel dry in the first inch or two, but feel like a wet sponge 4 inches beneath the surface.

Coco Perlite MixPerlite helps blend the coco coir’s water holding abilities more evenly throughout a pot, and helps to prevent over watering by allowing more even drainage and water retention.

Our early experiments used pure coco coir, which led to over watering, poor plant growth, plant damage, and some plant loss. Mixes with Perlite outperformed pure coco coir without question.

Getting started is easy.
Mix 60% dry coco coir(mixed variety of fiber, dust, and chunk) to 40% Perlite

Add a dry organic plant starter fertilizer like E.B Stone organics to the mix, at half the recommended quantities.

Add any Mycorrhizae, inoculants, and dry hormones to the mix. We like to give our young plants as much help as we can without overdoing it, and Mycorrhizae has been that extra boost that we can always rely on.

Now we will create a dilute nutrient solution. We will eventually add this to our dry ingredients, but its important to do a few things to it first. Its good to start with a PH neutral Distilled Water, but tap water will work, so long as it isn’t too hard.

If you can, try to monitor and adjust the PH of your solution, and if possible, to formulate your nutrient solution to be specific to your plant variety’s needs.

B vitamins, rooting and plant growth regulating hormones. Get some, and use them! They help prevent plant shock, and bring them back from wilt, etc. Or does is it? We say No, but we also say Yes. B Vitamin alone has not been proven to prevent shock, or stimulate root growth. Not consistently and conclusively since studies done on B Vitamins in the 30s that originally produced these claims. However! If a stressed plant in a bad wilted state is unable to produce its own Thiamine(B1), or the growing medium does not have a readily available supply, then a supplement will make it available to the stressed plant. We like to mix our B Vitamins with other less common nutrients, hormones, kelp blends, and then mix it all together with molasses and mycorrhizae to inoculate the medium as well as the plant.

Calcium and Magnesium
Coco fiber has a tendency to absorb Calcium and Magnesium, making it unavailable to plants. So either add some CalMag+ to your nutrient solution. Or make a Not to give your plants a foliar feeding of essential nutrients.

Mix the nutrient solution into the dry ingredients until the consistency is like loamy soil. You can use distilled water, but some nutrients really should be used, and/or a subsequent watering should have nutrients.

Don’t over saturate the growing medium, and make sure it is well mixed in a clean bucket, or tote.
Fill your growing container to the height that will support your plant or seedling. Don’t compact the mix, any more than it takes to keep a small plant in place.

Prepare your plant or seedling for planting. At this point, directly inoculate the roots with mycorrhizae or any other stimulants if you plan to use them.

Gently place your plant or seedling in the mix and fill around it until the mix is level with the base of your plant.

If you are compelled to compact the mix like you might to dirt… Well don’t. Only lightly compact the mix so that it can support the plant. It’s not soil, it just looks like it.

Tags: , , , | Comments