Deep Water Culture
How To: Setup a Deep Water Culture system. This basic hydroponic setup is easy, effective, and very affordable. A very simple setup can be put together for under $20. In this setup, a minimum amount of supplies are used *and I won’t show you $100 dollars of materials and say it can be done cheaper.. All, or most, of the supplies are available at home improvement stores, pet stores, or in some cases re-purposed materials from around the house. Alternatively, materials can be sourced from Ebay. For our most basic setup, you will want the following materials.
Tools
A sharp blade is the only require tool, but having a Drill, Dremel, 2″ hole saw, or Sharp Xacto knife, Scissors, Sharpie, and a ruler are all great.
Materials Required I always shop around for the best price, which is what I’ve listed. I’ve also included links to products on Amazon if you just want to purchase items quickly and aren’t being as cost sensitive.
5 Gallon Bucket ($2.50)
5 Gallon Bucket lid ($1.50)
6ft 5/16 Air Tubing ($2.00) – Buy on Amazon
10-20 Gallon(per bucket) Aquarium Air Pump ($5.00 to $16.00) – Buy on Amazon
*look at Walmart Aqua Culture: 5-15 Gallon, Single Outlet Aquarium Air Pump, 1 Ct for $6.97, or Ace Hardware Pet Supplies has a generic brand for just under $6
Air Stone/Diffuser ($1.29) – Buy on Amazon
Rock Wool ($4.95) – Buy on Amazon
4 3″ Net Pots or 6 2″ Net Pots($.30 to $.60 each) – Buy on Amazon
These Items Will Help You Increase Productivity
PH Test Kit and Conditioners – Buy on Amazon
Hydroton Grow Rocks ($6.95) – Buy on Amazon
Aquarium Check Valve ($2.00) – Buy on Amazon
Hydroponic Fertilizer ($15.00) – Buy on Amazon
Aquarium Thermometer (starting at $2.50) – Buy on Amazon


Measure and mark the holes in the bucket lid, where you will place your net pots. Net pots typically have a lip that is a greater diameter than their indicated size. This will hold the net pot in the holes you are about to make in the lid. Always double check the diameter required, or your net pots will not sit the way you anticipate. Don’t try to over crowd your pots. Four 4″ Net pots is probably going to be fine for a while, but as seedlings grow they will compete for space!
Step 2.
Cut the holes in the lid of your bucket. The easiest way is to use a drill with a hole saw, that matches your required hole size. *Always use caution when using power tools, blades, or saws.
Step 3.
Drill a hole, the same size as the outer diameter of your air tubing, in the bucket lid. Place the hole near an edge, so it will be out of the way of plant life.
Step 4.
Clean, or sterilize, your bucket. Rinse thoroughly, then fill bucket to about 2.5 inches below the rim. Its easiest to fill a bucket in its final destination, but also not impossible to move if this isn’t an option. Tap water is rarely going to have a PH perfect for your plants. Testing your water, and adjusting it to a PH range of 5.5 to 6.5 may be beneficial for whatever it is you will grow. The final water level height should end up just below, or barely touching, the bottom of your net pots. After some root growth, the water level should be dropped, to provide better aeration to roots, and encourage growth. Evaporation may do this for you.
Insert a 3 to 4 foot length of air tubing through the small hole in the bucket lid. A length of the tubing that just reaches the bottom of the bucket should stick out the bottom of the lid. The rest of the line will run to the air pump. Attach the air stone to the length of tubing sticking out of the bottom end of the lid.
Step 6.
Firmly attach the lid to the bucket. Attach the loose end of the airline to the air pump. *Edited 5/11 – Place the air pump above the water line of your buckets to protect siphoning in the event of power failure. A one way check valve is also great protection for your air pump.
Step 7.
Be sure the environment, pump and components are dry before plugging in and/or turning the pump on. Let the air pump run overnight without plants, the bubbling will aid in the removal of chlorine.
Step 8.
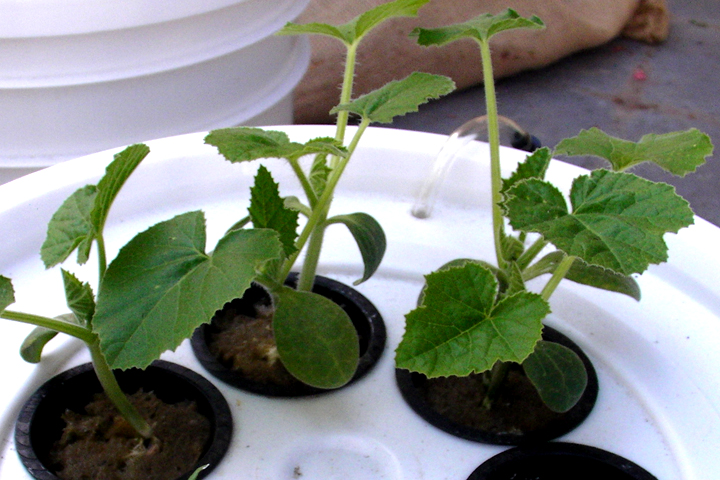
Prepare net pots, with rock wool, hydroton, or other growing medium of choice, and your seeds, or seedlings to be ‘planted’. Some growing mediums, like rock wool recommend an initial soaking in PH adjusted water. The rock wool used to start our plants is the same growing medium we use through our entire grow. Unused Rockwool from germinating seeds was used to shim and fill empty net pot space. This keeps cost on an additional growing medium down. Plant roots will eventually fill the net pots anyway.
Step 9.
Add any hydropnic fertilizers that you might choose to use to feed your plants. Double check that the PH is in the range of 5.5 to 6.5 if you can, as fertilizers can change the PH level. Insert net pots with plants. Alternative fertilizer options that are “free-ish” like, leaching old coffee grinds, dissolving eggshells with lime juice, or dissolving multivitamins and other supplements from a pantry can be used instead of commercial fertilizers, but growing results will be less predictable.
Step 10.
Enjoy your new Deep Water Culture System. Although starting from seed is ideal, transplanting with donor plants, or test dummies, is an okay approach to learning how to feed, and maintain your plants. Once you feel like you have a stable operation, flush the system and start anew, or setup another bucket with the seeds or seedlings you intend to grow to life expectancy. For more information on transplanting to deep water cultures, see our instructional post: Soil to Hydroponic Transplants.
Updates! Algae
If you are growing on a warm patio, algae, or other disease could effect your plants. Two reasonable methods of control are to use diluted food grade Hydrogen Peroxide, or a drop of Chlorine per gallon of water. Cooling the water temperatures, or rinsing roots and replacing water also helps.
Updates! Deep Water Culture Now an Aquaponic System!
Growth has been phenomenal, but hot weather does encourage algae growth in buckets exposed to sunlight. Fortunately, the warm conditions are also perfect for, algae eating fish. I’ve added a school of 5 chinese algae eating fish, and they are doing an exceptional job cleaning. They are also doing well in a system that has no mechanical filtration. The natural plant root filtration and heavy aeration is enough too keep a small school of them healthy thus far. Rising air bubbles actually circulate any algae debris through the root system, and mechanically filters the water.