Grow Light Basics

| December 23, 2012
Photo Credit: Keith Knoxsville
A Hen and a Drake Green Teal on the truck bed. Not a limit on anything, but a fun morning out.

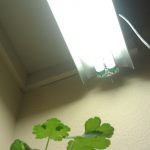
indoor shop grow lightThere are a couple common misconceptions about growing plants indoors with artificial lighting, but growing plants under lights indoors doesn’t have to be a technical or expensive endeavor. Cover/Feature photo: Pink Lemonade Blueberries Under Indoor Grow Lights, Gardenisto © 2012; Photo Left: Golden Currants under T8 Lights © 2012; Bottom Left:Pink Lemonade Blueberries under T8s © 2012.

The first common misconception is that special and expensive light bulbs are required for growing indoors. The truth is you do not need special or expensive lighting. A common 4 foot T8 shop light fixture can be purchased from your local hardware or home improvement shop for about $20, and will be suitable for growing small plants. The bulb also does not have to be special. However, it does need to be selected carefully from all the options you will have at the hardware shop.

pink lemonade blueberriesMany fluorescent T8 light bulbs won’t do much for your plants. Plants use blue wavelengths of light for green growth and red wavelengths for flowering. Without getting too technical, red is at the bottom of the light spectrum, and blue is at the top end.

Light bulbs have a light/color spectrum rated in Kelvin. Most light bulbs in the hardware shop will have a ‘cool white’ output in the middle of the spectrum at 3500k to 4100k, but what you need for healthy plants is at the higher and lower ends of the spectrum.

Look at the bulb packages and find a 6500K bulb. This will provide the full light spectrum, including blue light that plants need. Common T8 Light fixtures hold 2 to 4 bulbs, so if you are interested in getting your plants to flower you can use a bulb with a K rating of 3000 or less, in conjunction with a 6500k bulb.

This brings us to the final misconception on costs. A two bulb T8 shop light fixture costs 20 dollars, and a two pack of T8 fluorescent light bulbs costs less than 8 dollars. The total equipment cost for a small growing space is about 28 dollars. Get fancy and add a mechanical timer for 4 bucks, and you have yourself an automated system.

So what about the electrical bill? Your electrical bill is not going to sky rocket. A rough estimate of the operational cost of a two bulb T8 light fixture, running 16 hours a day, is between 4 and 8 dollars a month. Annually that’s a cost of no less than 48 dollars, and no more than 96 dollars per year. Your actual cost will be based on your kilowatt/hr rate, which you can find in your electrical bill.

Tags: , , , | Comments

Winter Gardens

| December 15, 2012
Photo Credit: Keith Knoxsville
A Hen and a Drake Green Teal on the truck bed. Not a limit on anything, but a fun morning out.

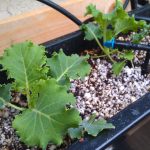
Hydroponics with a winter crop of KaleYou don’t have to wait until spring to have a healthy and productive garden. The weather in your area might actually be perfect for leafy greens, root crops, and herbs.

Kale, Cabbage, Collard Greens, Carrots, Beets, Radish, Turnips, Kohlibri, Swiss Chard, Parsely, Spinach, and various herbs all have a place in a winter garden.

If you live in a warmer climate it is possible to grow potatoes in raised planter beds. The raised beds, tote boxes, or even tires, as well as planting mediums like straw provide some insulation, and allow potatoes to thrive through cold spells.

Our winter gardens are often a combination of leafy greens, root crops, potato boxes, and whatever we can continue to produce beyond fall. We are fortunate enough, within our microclimate in Southern California, to produce both tomatoes and corn into December.

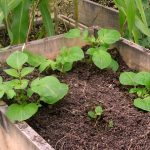
Potato Boxes can Survive WinterIn some zones it may be unrealistic to produce anything outdoors very well. Of course there are hydroponics and indoor growing alternatives, and mini-greenhouses, but it could just be a great opportunity to fix nitrogen with a cover crop or let fall leaves compost and enrich your soil.

If you waited until December to take action on a cover crop, you may be too late. You could try and get a late start on Field Peas, Winter Wheat, Ryegrass, Oats, or Clover, but you may not get them going as you might have in September, October, or even November.

If you get your winter cover crop growing, be sure to mow down or top plants before they go to seed, or you will end up competing with your cover crops as they germinate in spring. We till our soil, and try and let the soil sit for at least a week before planting or sowing seed.

While there are some proponents of no-till techniques that you can experiment with, we have always had great success tilling cover crops and fall compost into our soil, so we are sticking to it.

Tags: , , | Comments

Growing in Coco Coir: Getting Started

| December 9, 2012
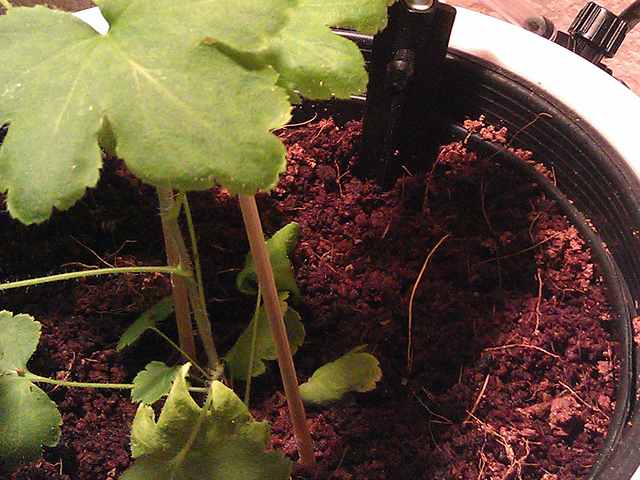
Coco Mix
Photo Credit: Keith Knoxsville
A Hen and a Drake Green Teal on the truck bed. Not a limit on anything, but a fun morning out.

Coco Coir is an increasingly popular growing medium in hydroponics, and is generally considered to be a more sustainable and eco friendly replacement to peat.

This article isn’t meant to start a raging debate about which growing medium or method is best. It is intended to help those interested in using coco coir get started with it as a growing medium.

So raging debates aside, a 60/40 or 50/50 mix of coco coir to Perlite is the preferred growing medium at Gardenisto.

Very specifically, we like the coco coir products that contain a blend of coco fiber, dust and chunks. The blend creates a soil like medium that is clean and familiar to work with.

While coco coir can be used as a growing medium on its own, it acts too much like a sponge, and in most of our applications plants have done better when Perlite is mixed in.

Perlite adds aeration to the mix, and improves drainage. Without the Perlite in the mix, it is difficult to tell if coco coir is saturated. The growing medium can look and feel dry in the first inch or two, but feel like a wet sponge 4 inches beneath the surface.

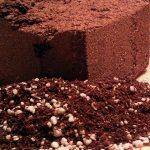
Coco Perlite MixPerlite helps blend the coco coir’s water holding abilities more evenly throughout a pot, and helps to prevent over watering by allowing more even drainage and water retention.

Our early experiments used pure coco coir, which led to over watering, poor plant growth, plant damage, and some plant loss. Mixes with Perlite outperformed pure coco coir without question.

Getting started is easy.
Mix 60% dry coco coir(mixed variety of fiber, dust, and chunk) to 40% Perlite

Add a dry organic plant starter fertilizer like E.B Stone organics to the mix, at half the recommended quantities.

Add any Mycorrhizae, inoculants, and dry hormones to the mix. We like to give our young plants as much help as we can without overdoing it, and Mycorrhizae has been that extra boost that we can always rely on.

Now we will create a dilute nutrient solution. We will eventually add this to our dry ingredients, but its important to do a few things to it first. Its good to start with a PH neutral Distilled Water, but tap water will work, so long as it isn’t too hard.

If you can, try to monitor and adjust the PH of your solution, and if possible, to formulate your nutrient solution to be specific to your plant variety’s needs.

B vitamins, rooting and plant growth regulating hormones. Get some, and use them! They help prevent plant shock, and bring them back from wilt, etc. Or does is it? We say No, but we also say Yes. B Vitamin alone has not been proven to prevent shock, or stimulate root growth. Not consistently and conclusively since studies done on B Vitamins in the 30s that originally produced these claims. However! If a stressed plant in a bad wilted state is unable to produce its own Thiamine(B1), or the growing medium does not have a readily available supply, then a supplement will make it available to the stressed plant. We like to mix our B Vitamins with other less common nutrients, hormones, kelp blends, and then mix it all together with molasses and mycorrhizae to inoculate the medium as well as the plant.

Calcium and Magnesium
Coco fiber has a tendency to absorb Calcium and Magnesium, making it unavailable to plants. So either add some CalMag+ to your nutrient solution. Or make a Not to give your plants a foliar feeding of essential nutrients.

Mix the nutrient solution into the dry ingredients until the consistency is like loamy soil. You can use distilled water, but some nutrients really should be used, and/or a subsequent watering should have nutrients.

Don’t over saturate the growing medium, and make sure it is well mixed in a clean bucket, or tote.
Fill your growing container to the height that will support your plant or seedling. Don’t compact the mix, any more than it takes to keep a small plant in place.

Prepare your plant or seedling for planting. At this point, directly inoculate the roots with mycorrhizae or any other stimulants if you plan to use them.

Gently place your plant or seedling in the mix and fill around it until the mix is level with the base of your plant.

If you are compelled to compact the mix like you might to dirt… Well don’t. Only lightly compact the mix so that it can support the plant. It’s not soil, it just looks like it.

Tags: , , , | Comments