DIY Drone/Quad Part 1 Intro
In this short series of posts, I will show you how to build your own drone, with a transmitter, complete with joysticks, a receiver to receive your instructions, and a flight controller to control the stability and flying characteristics of your quad/drone. The complete build is under 200 bucks, plus or minus a few miscellaneous items.
I also want to make clear, that to use this build guide, a basic knowledge of soldering, electronics, fabrication, and programming, will be necessary. This is not for everyone, but its not beyond learning how to do these things either. While I don’t want to make the build sound complicated, I don’t want to over simplify it either. Expect and or be willing to learn, test, experiment, and be patient; and the experience should be rewarding.
I needed a platform for doing aerial surveys of large agricultural properties for a work contract. Since I have a programming background, experience working with micro-controllers, IOT applications, fabricating, and a history of working with radio control vehicles, it made sense to build a drone from opensource hardware. Building your own drone is actually quite affordable compared to some of the commercial options. With patience, and some tweaking its possible to build a reliable drone.
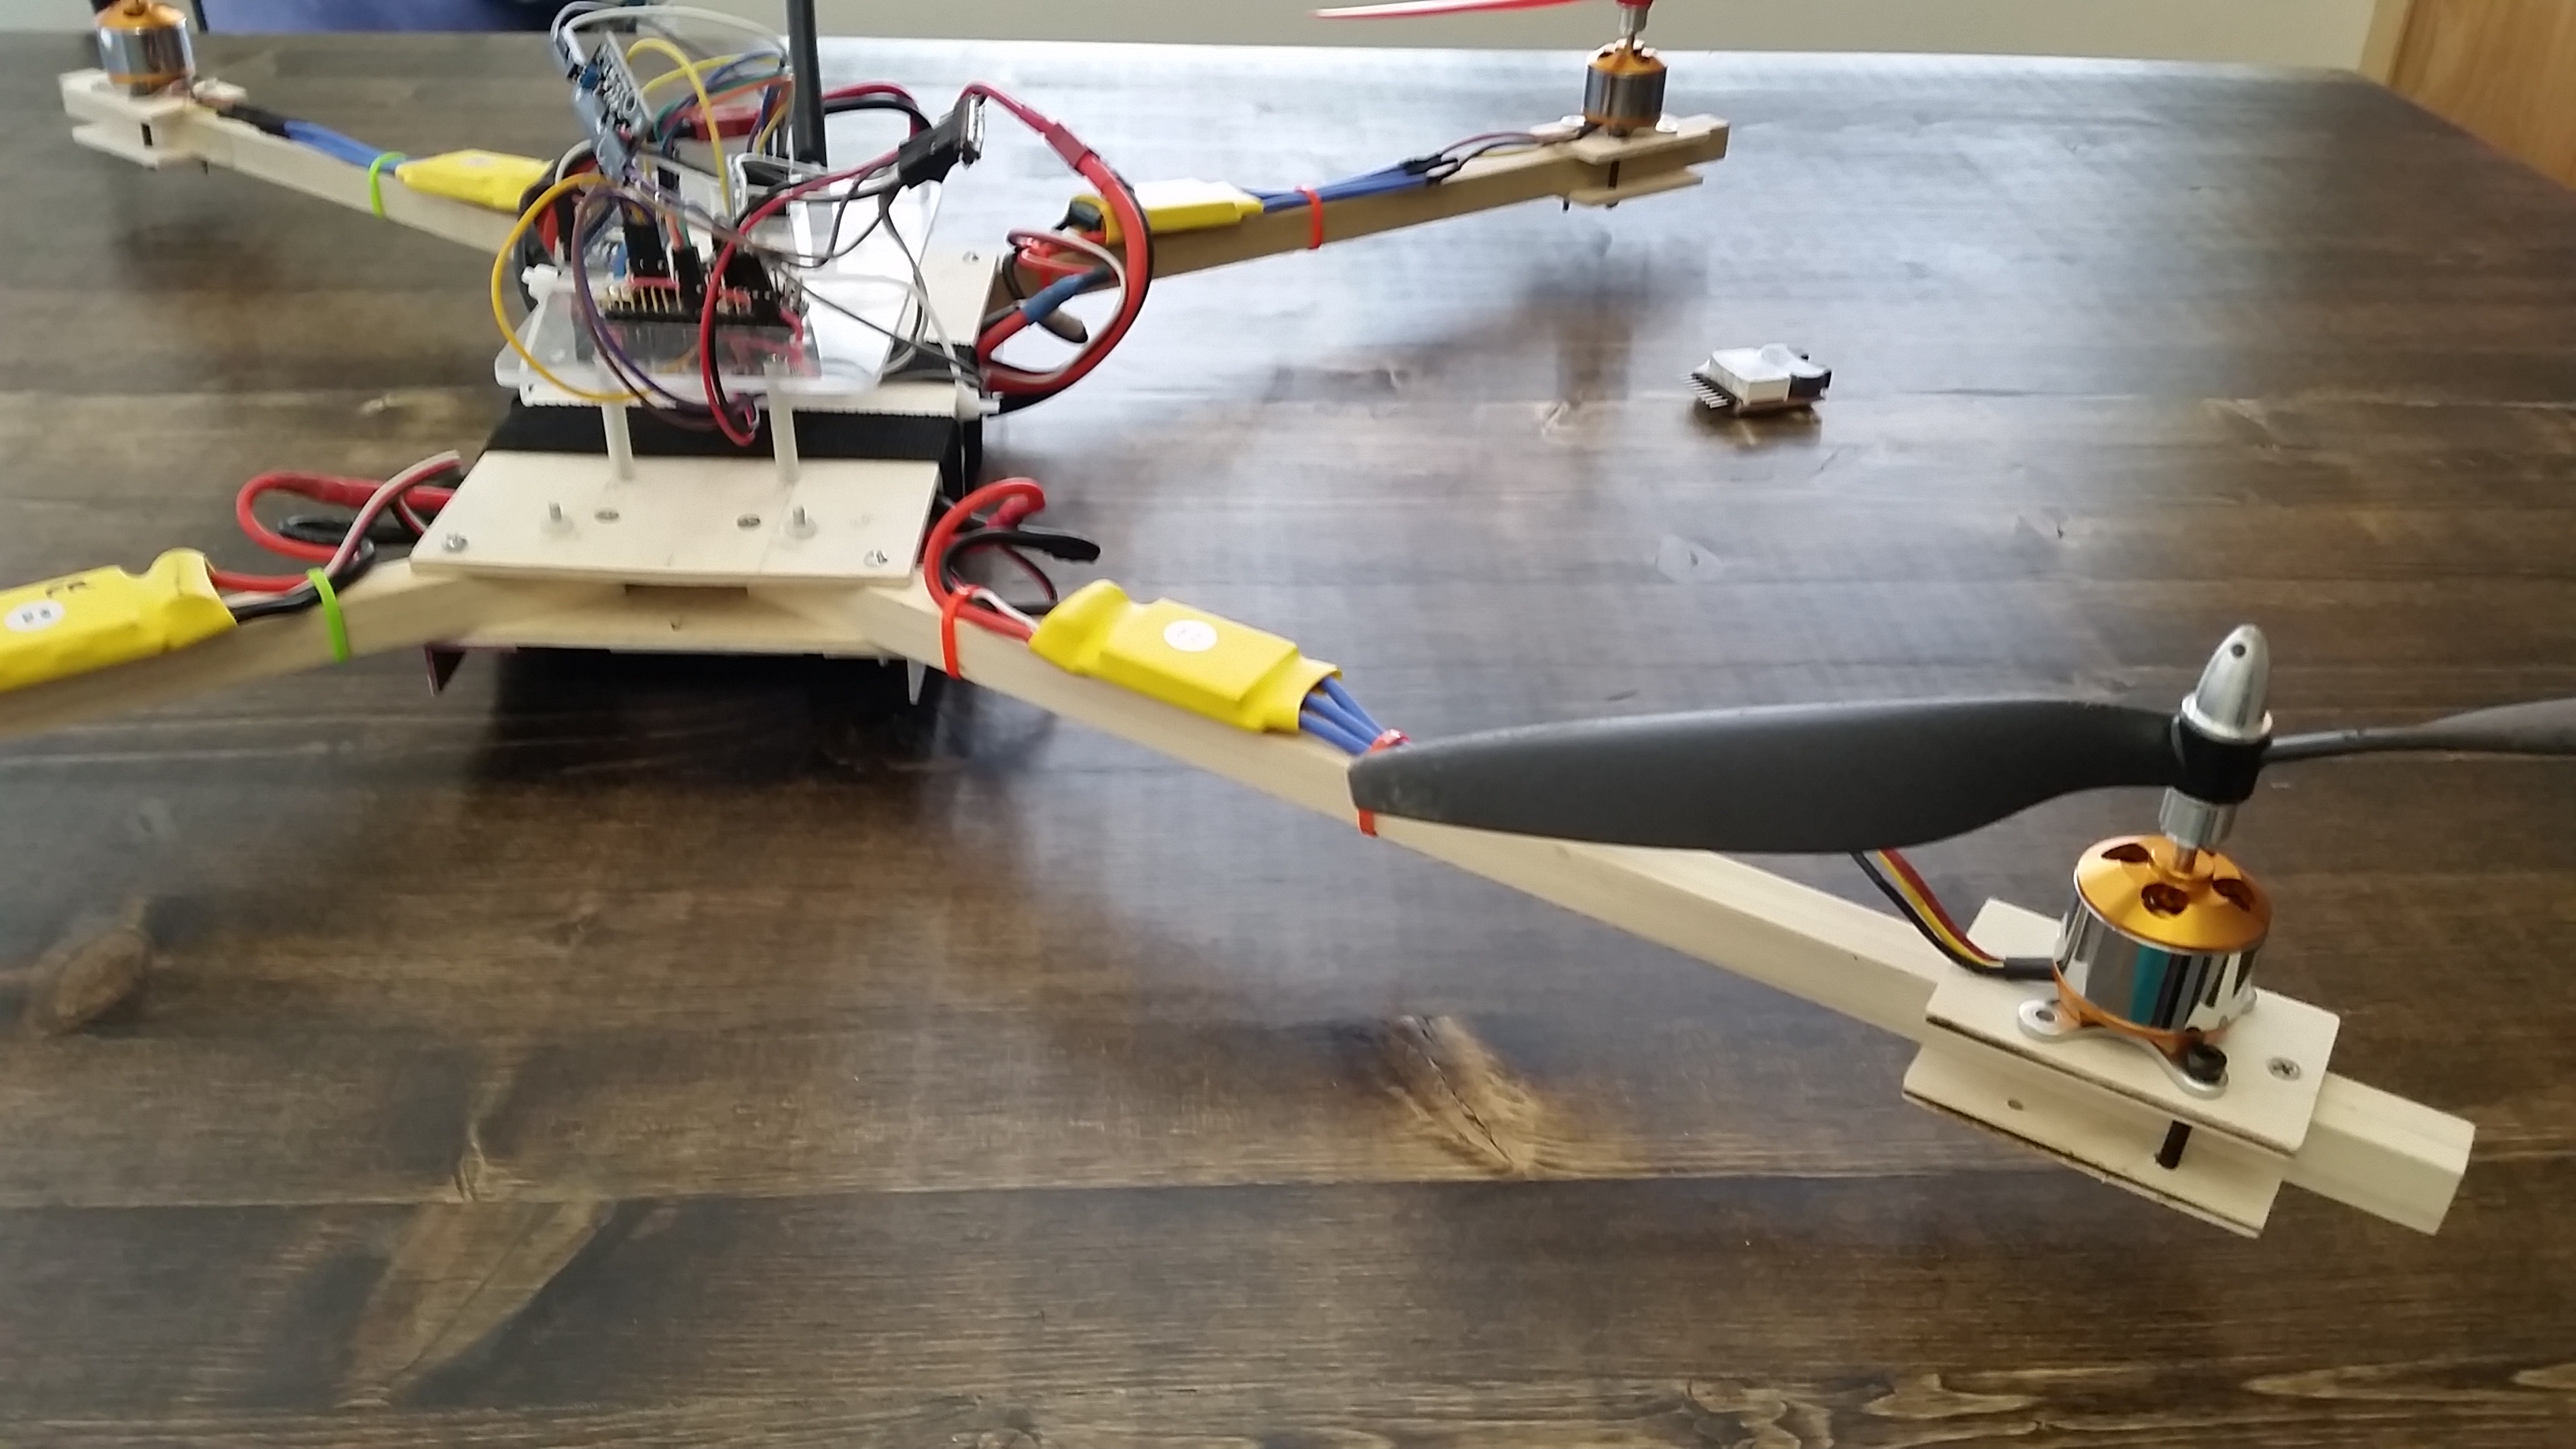
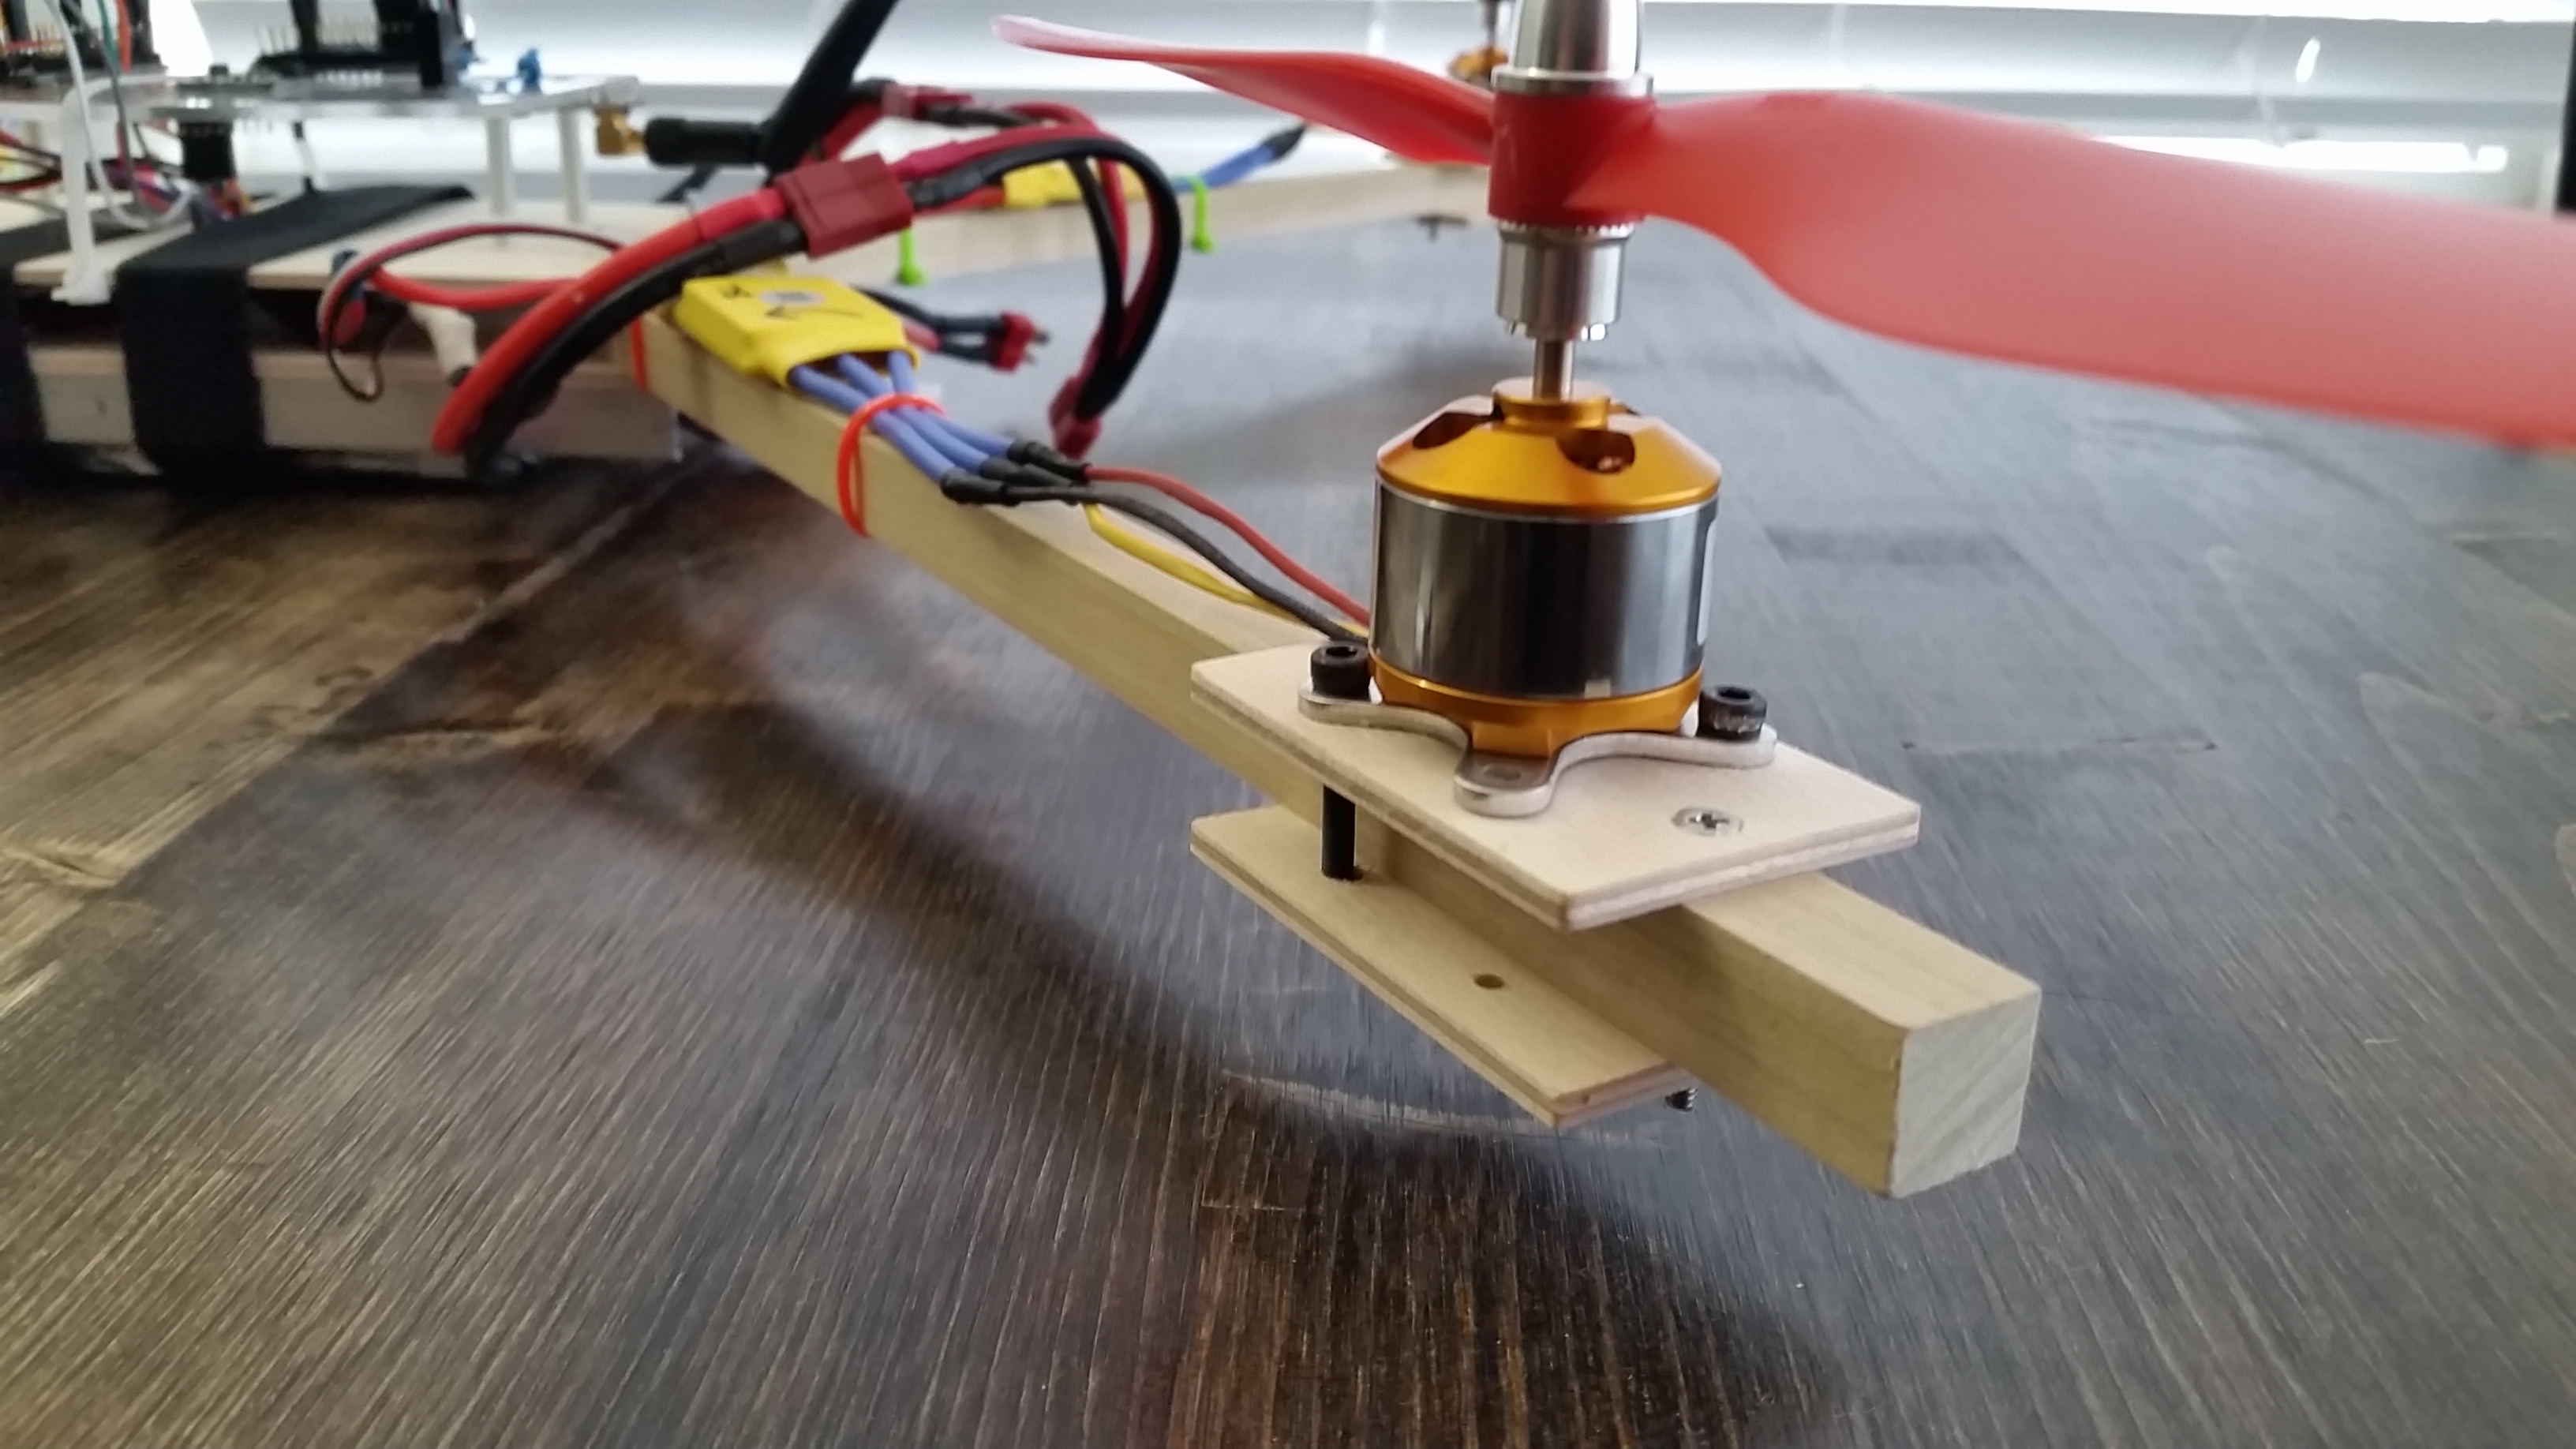
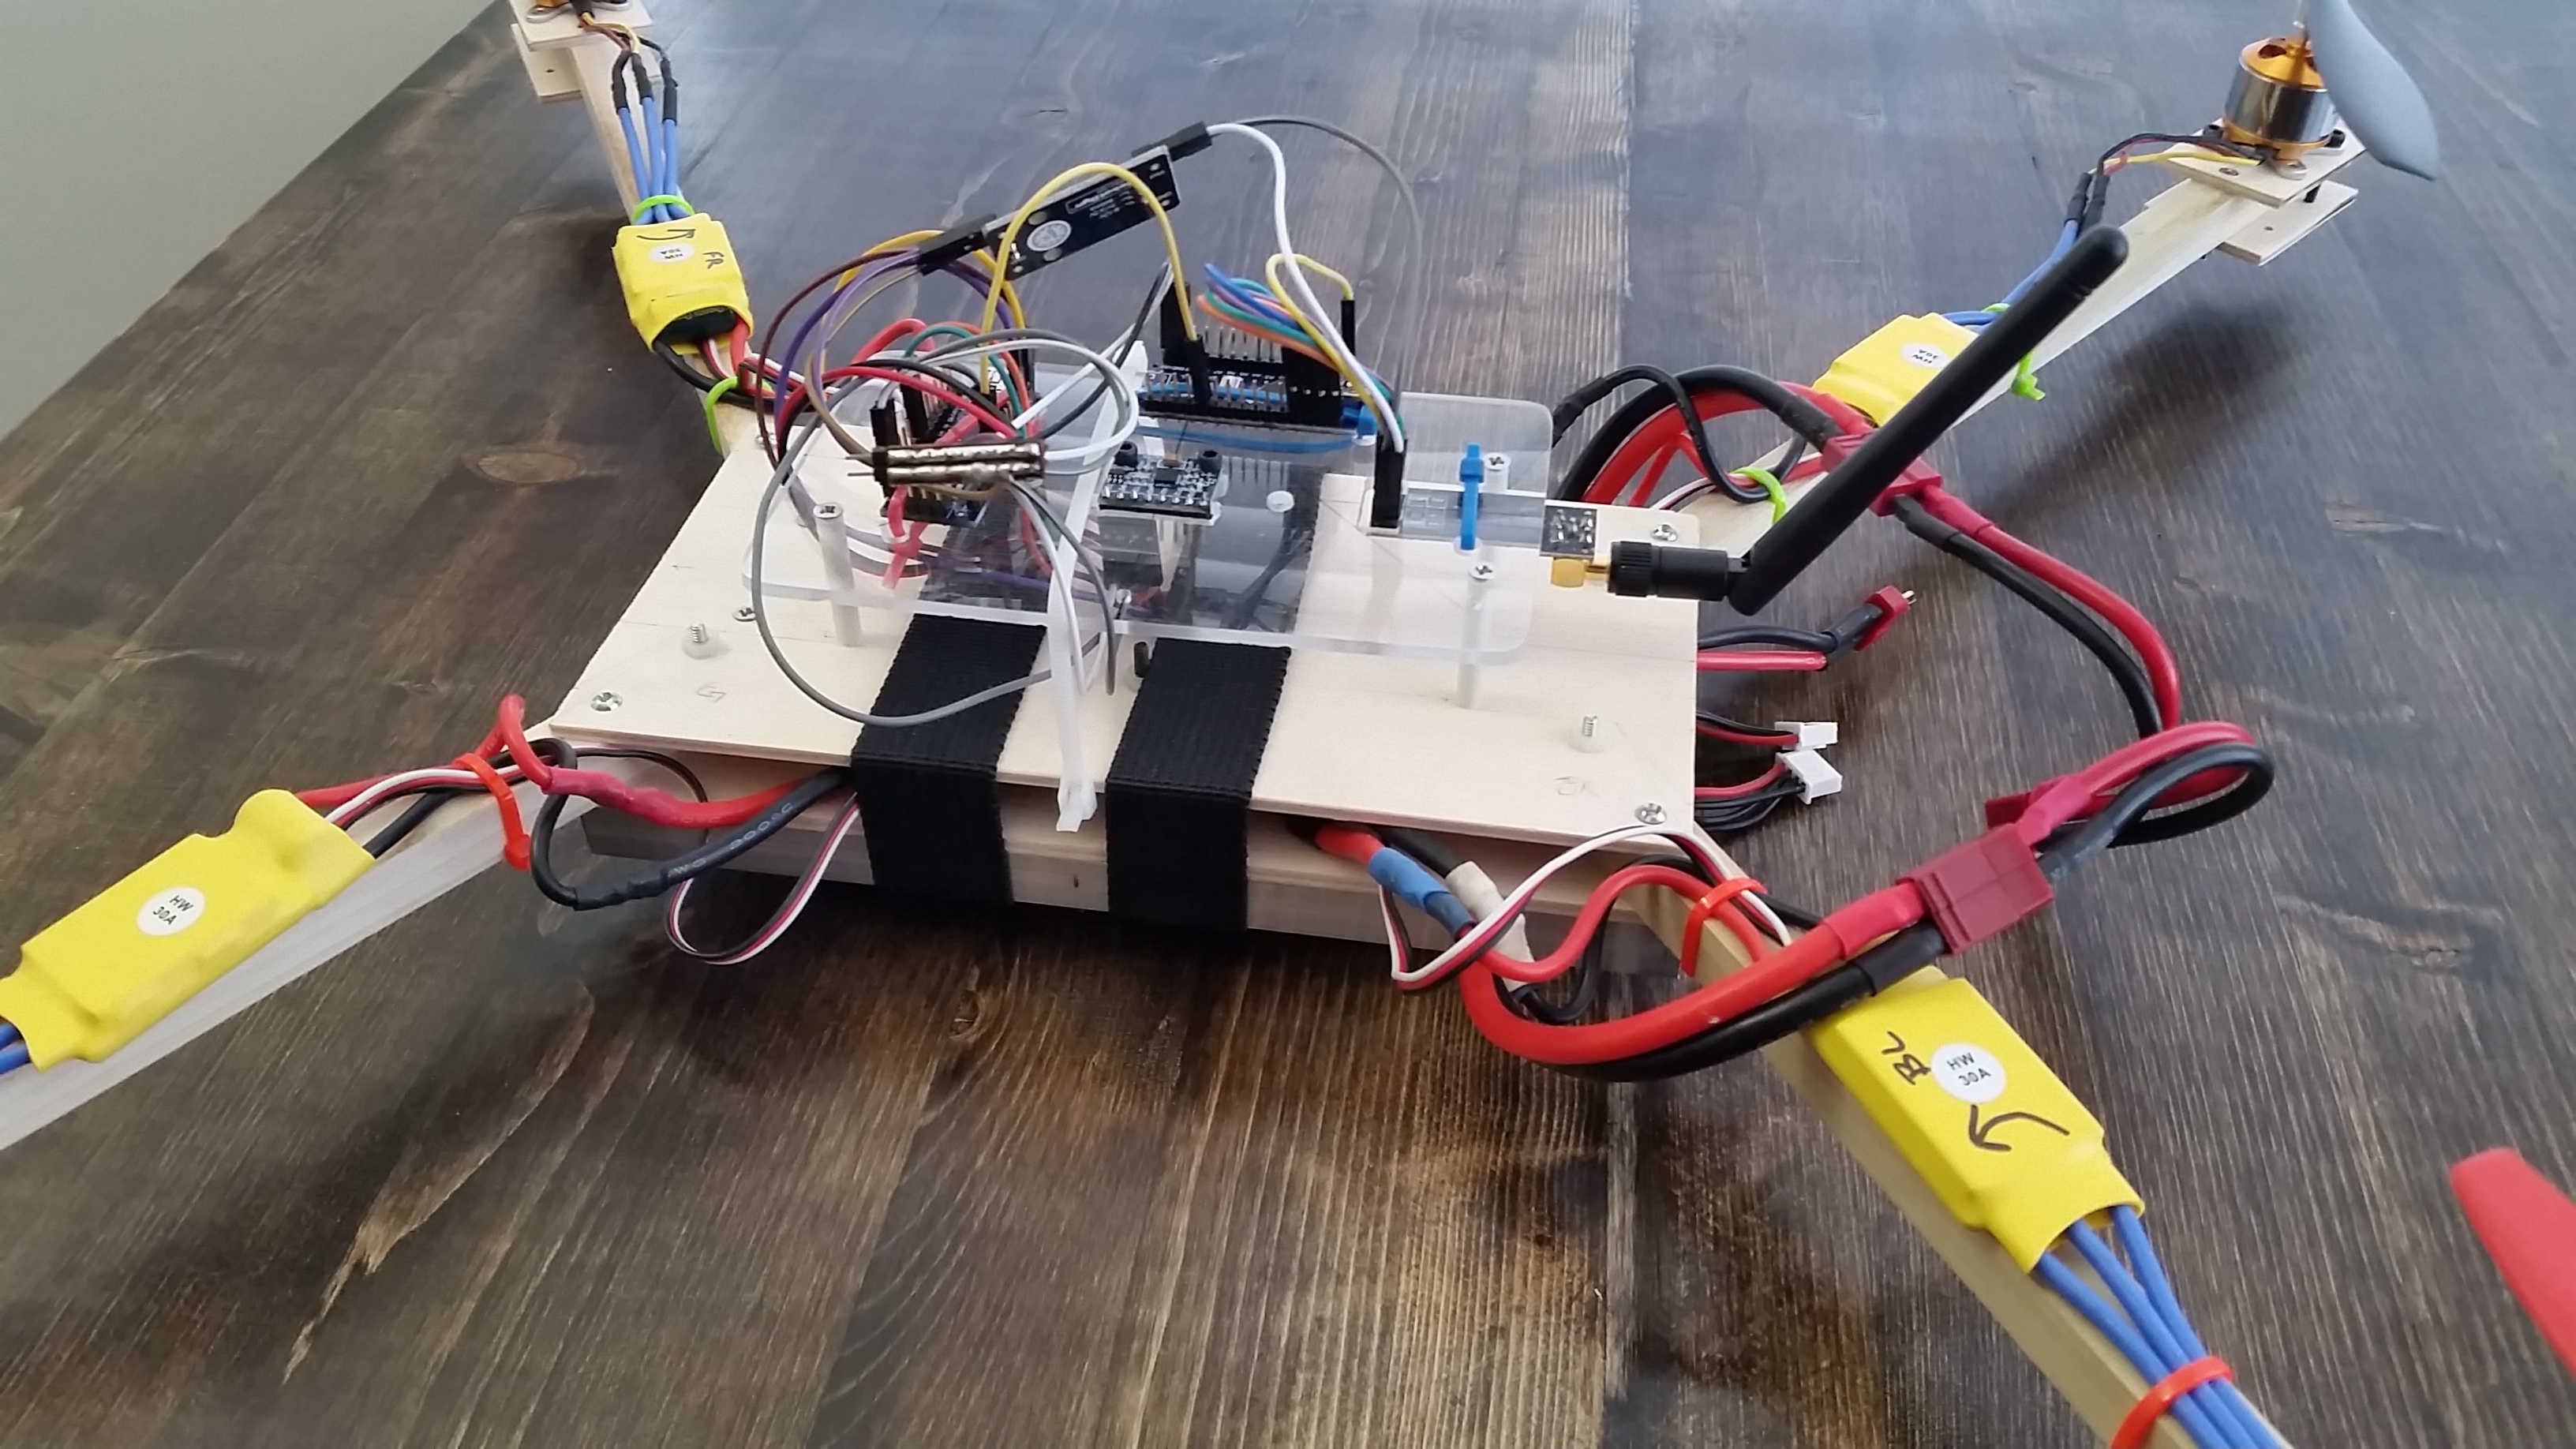
The drone is a quad copter design that uses arduino microcontrollers for the receiver, the transmitter, and flight controller, an mpu6050 sensor for stabilization, nrf24l transceivers for communication, (4)30amp escs, (4)2212/13 1000kv motors, (4) 10×4 props, (2) 3000mah 30C li-po batteries, and a large frame built from whatever you have on hand. Or you can build it from cheap wood materials.
The cost when finished and flying is less than 200 dollars. Compare that to a much more expensive drone, that you’d never really want ‘modify’ or make your own because of the risk you might damage it. Of course, a more expensive version from more expensive parts can be made. But it hurts a tad less when you crash less expensive materials.
The programming that controls the quad is open source code, uploaded via the Arduino IDE, and configured via Multiwii Software(software that helps you visualize and set settings on the quad/drone). Its based primarily on the hard work and public contributions of many generous programmers, and developers.
To Summarize, We will:
- This Overview – Part 1
- Build a transmitter/controller – Part 2
- Build a receiver – Part 3
- Build a flight controller to stabilize the quad/drone – Part 4
- Build a quad/drone frame – Part 5
- Program the transmitter, receiver, and flight controller with an Arduino IDE <- Software Using code called Multiwiiv – Part 6
- Calibrate the Motors with Multiwii code – Part 7
- Adjust settings and calibrate our gyro via Multiwii GUI AKA a graphical interface/software for your computer – Part 7
- Go Fly
In the interest of full disclosure, I make an affiliate commission if you use the links below. So if you find this build log helpful, and want to support more quality posts, then use the comprehensive list of Amazon links below, Thanks.
Electronics Parts List:
- (4) 2212/13 1000kv motor + 30 amp ESC – http://amzn.to/2BiJhyE
- (3) Arduino Nanos (receiver board, flight controller, transmitter board- http://amzn.to/2G5Rg5R
- NRF24L 2.4g transceiver set (will actually transmit and receive signals) – http://amzn.to/2F03Lyc
- mpu6050 (gyro accellerometer to keep us stable) – http://amzn.to/2F1RXeS
- (2) 3000mah 30c Lipo Battery – http://amzn.to/2COdaZj
- 10×4 props w/aluminum hubs (included in motor esc kit
- (2) 3.3v voltage regulators (provide the right voltage and stable current to the transmitter and receiver) – http://amzn.to/2F1mSrO
- Power distribution board with Deans Type Plugs – http://amzn.to/2DvWfz7
- Joysticks (this is a 10 pack for the price of 2, you only need 2 – http://amzn.to/2G50kbc
- 120 piece Jumper wire set – http://amzn.to/2DqX8of
- 6AA Battery Box to power the transmitter. However the ideal power source would be a 7 to 12v MAX battery for the Arduino to provide stable power
- A mix pack of zip ties ranging from 4 inches up to around 10 – Wally World has some fun colors.
Frame Parts List:
These are parts for a wood framed version, its easy to make, and parts can be acquired at a Homedepot, Lowe’s, and any craft store that sells 3mm birch. I went to Michael’s.
- (2) 36″ 1/2″ square hardwood dowels
- (2) 200mm x 100mm x 3mm birch plywood
- (8) 4cm x 6cm x 3mm birch plywood pieces
- A large variety of 4-40 or m3 screws and nuts

Leave a Reply