Seed Starting
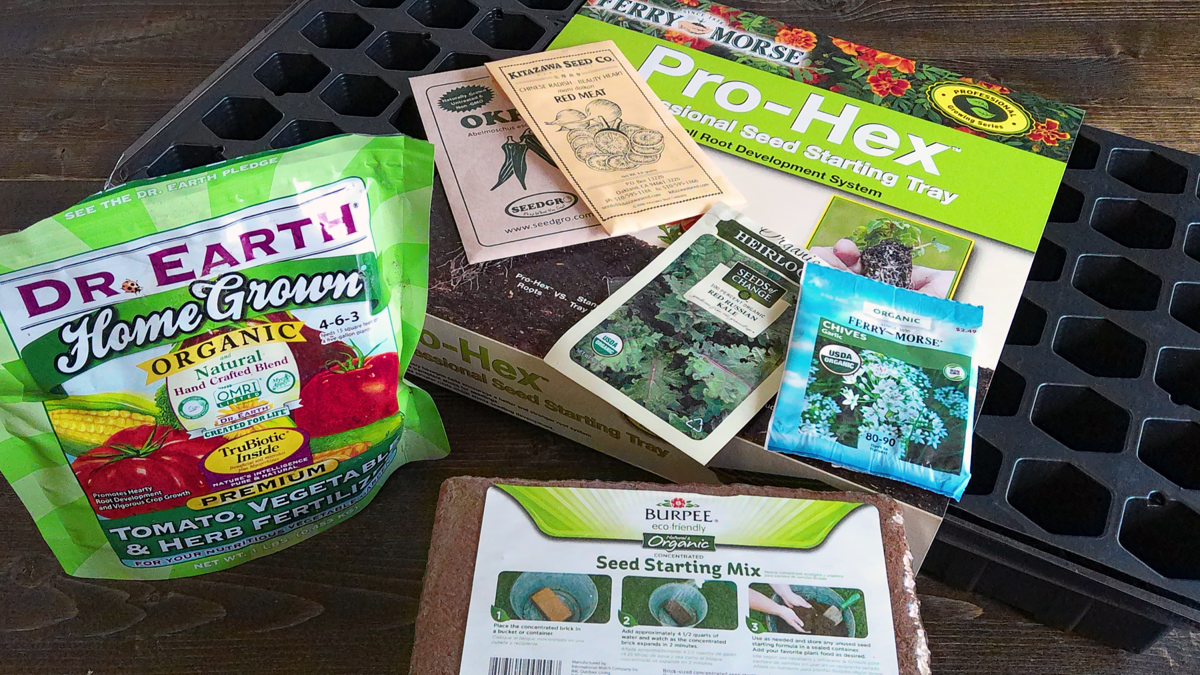
Photo Credit: Keith Knoxsville
A Hen and a Drake Green Teal on the truck bed. Not a limit on anything, but a fun morning out.
It’s the time of the year for seed starting, and while it’s not a difficult thing to do, we put together a seed starting guide to help ensure a high rate of germination.
While there is nothing wrong with directly sowing seeds in the garden, we prefer starting seeds indoors, in seed starting trays. The trays produce healthy plants with a nice plug that is easy to transplant later.
Successful seed starting depends on creating and controlling perfect germination conditions. Seeds require warm temperatures, moisture, and a near sterile growing media.
What You’ll Need:
Coco Fiber, Burpee Organic
Perlite
72 Cell seed starting tray, Pro-Hex
Dr. Earth organic fertilizer - Recommended
Seed Starting Heat Mat - Recommended
Rockwool Cubes - For Hydroponic Applications
Making The Seed Starting Media
Place a brick of coco fiber, perlite, and a little bit of organic fertilizer in a 5 gallon bucket.
Bring about 4 liters of water to a boil on the stove top, or electric kettle.
Hydrate the coco fiber brick with the hot water. The hot water will expand the coco fiber, and sterilize the media at the same time.
Mix all the contents of the bucket thoroughly. Use a tool, and be careful not to burn yourself. If you have one, an all metal paint mixer is the ideal mixer for lightweight seed starting media.
Measurements for the seed starting ratio are fairly loose. To get the right mix we use 1 brick of coco fiber, 4 to 6 quarts of perlite, and about 1 cup of Dr. Earth Organic fertilizer. Seedlings don’t need
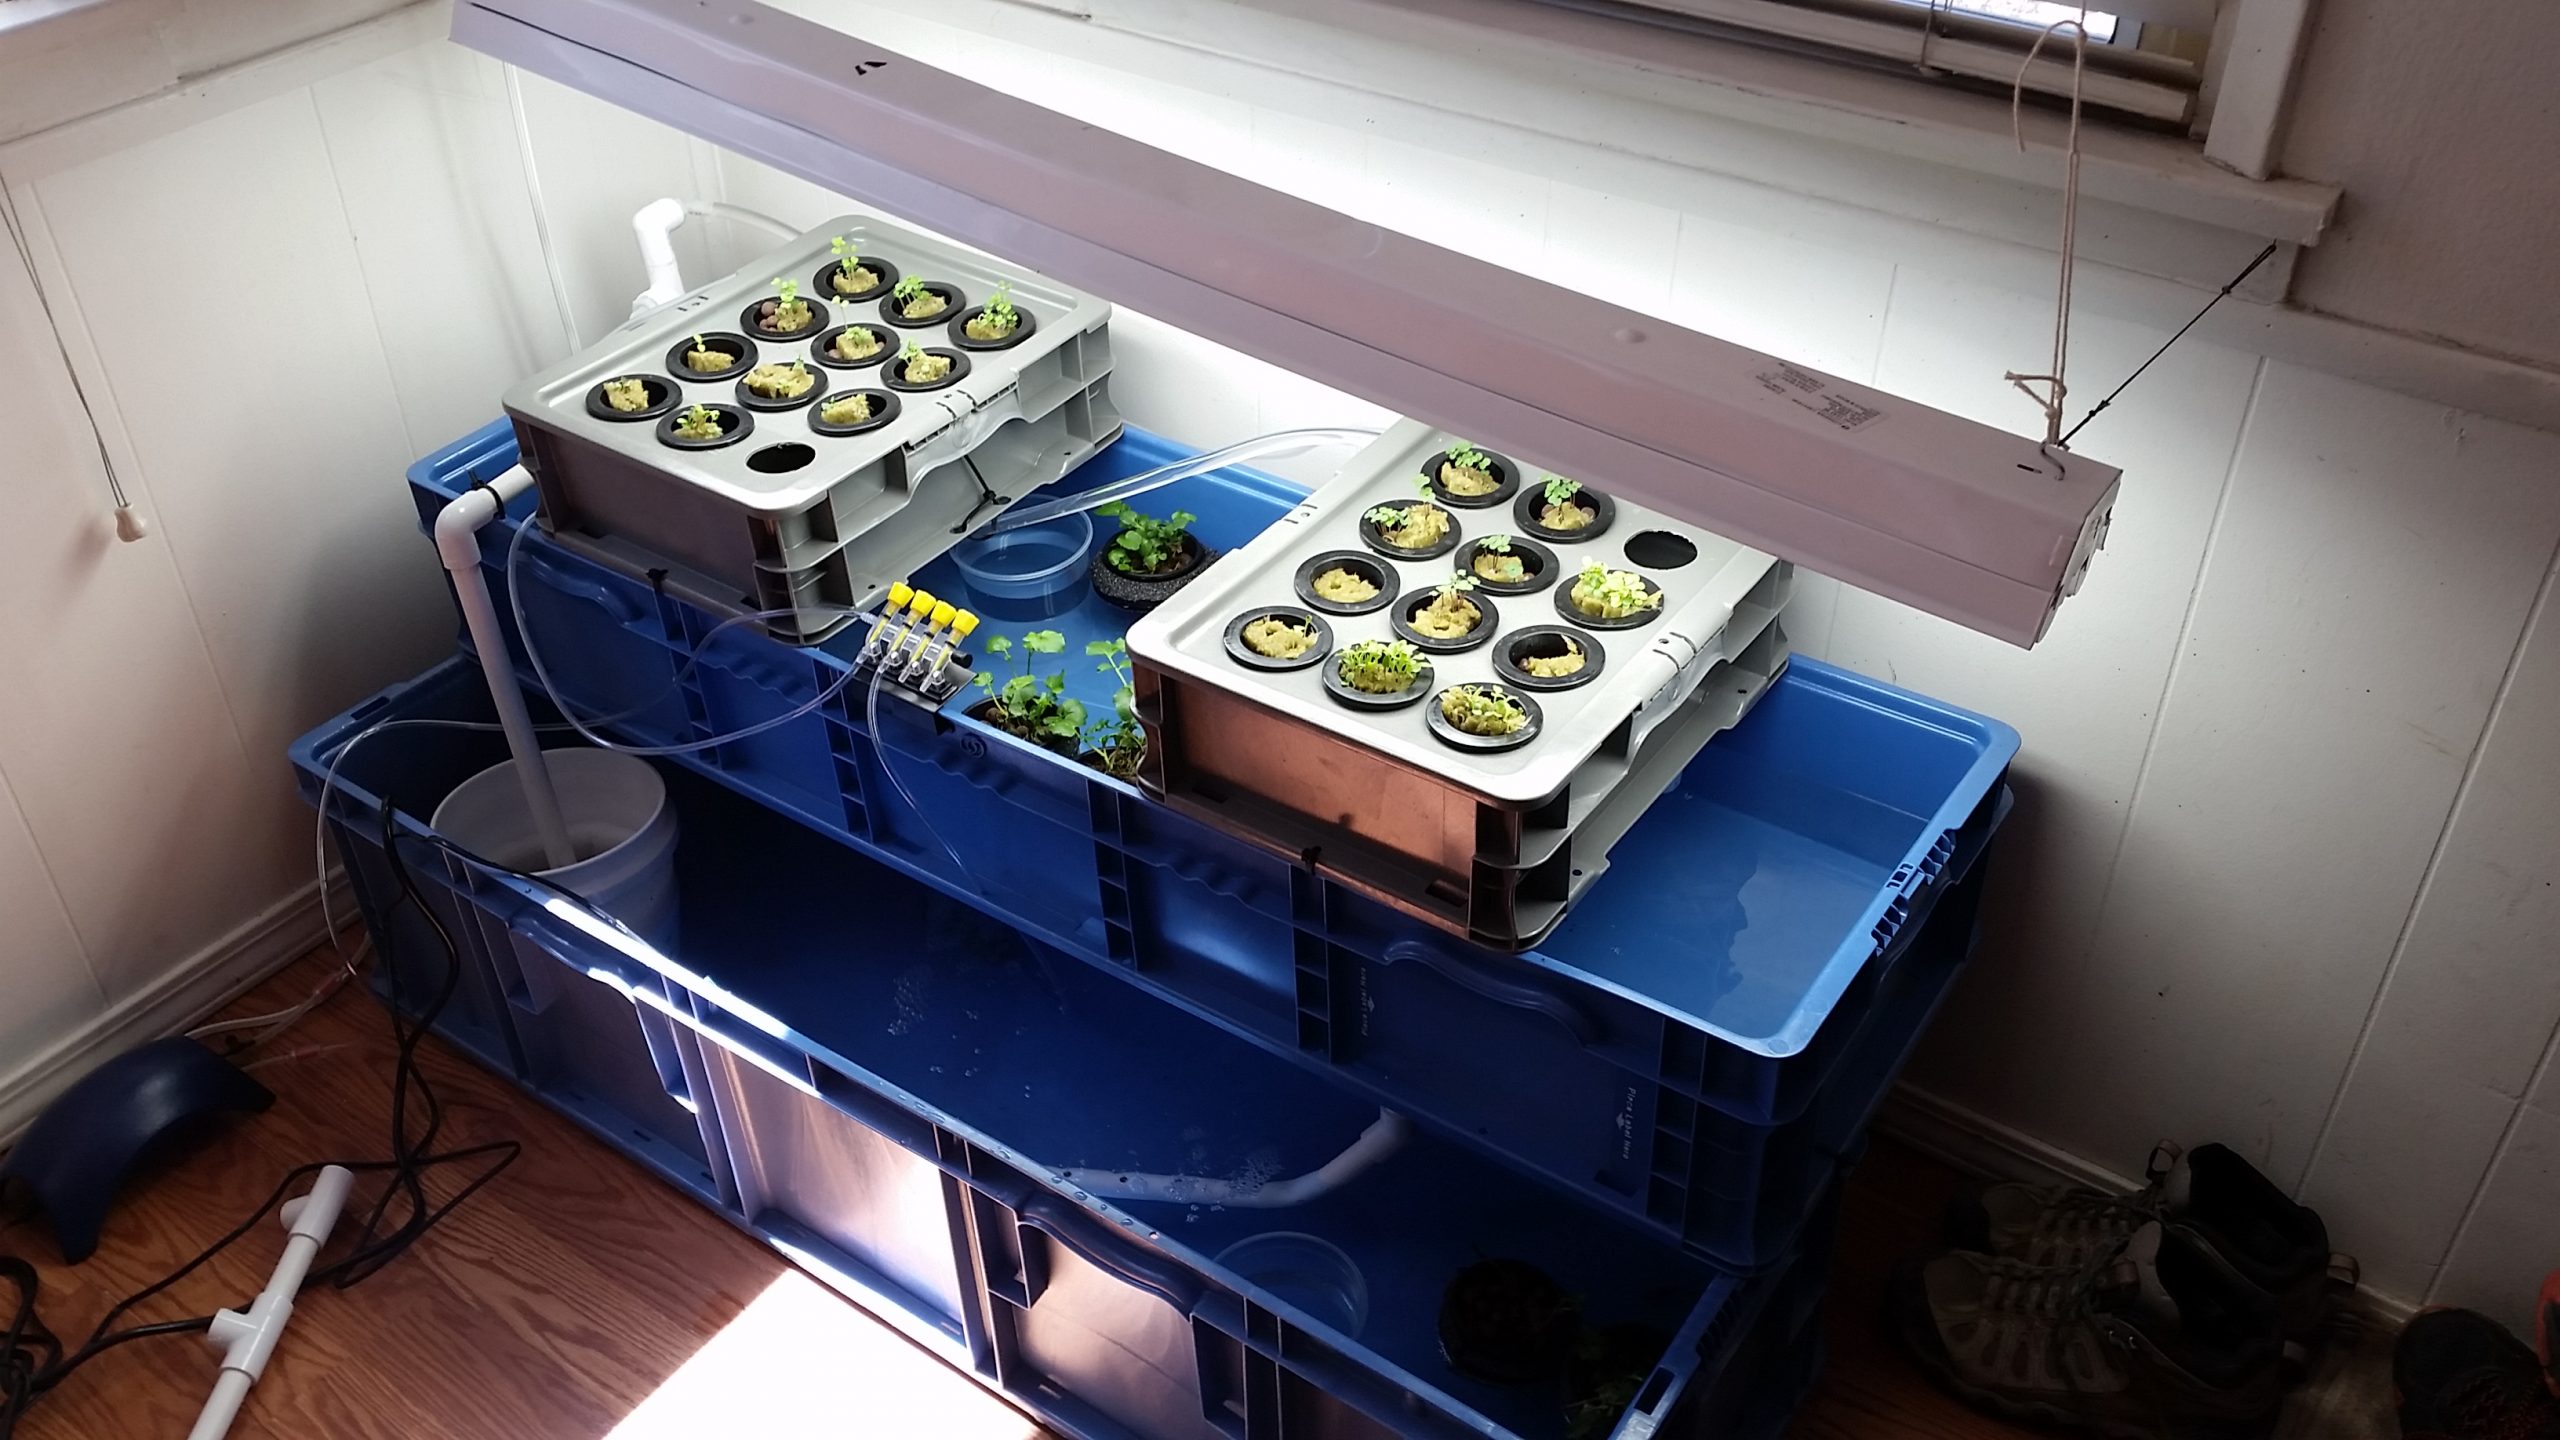
Setting Up the Seed Tray
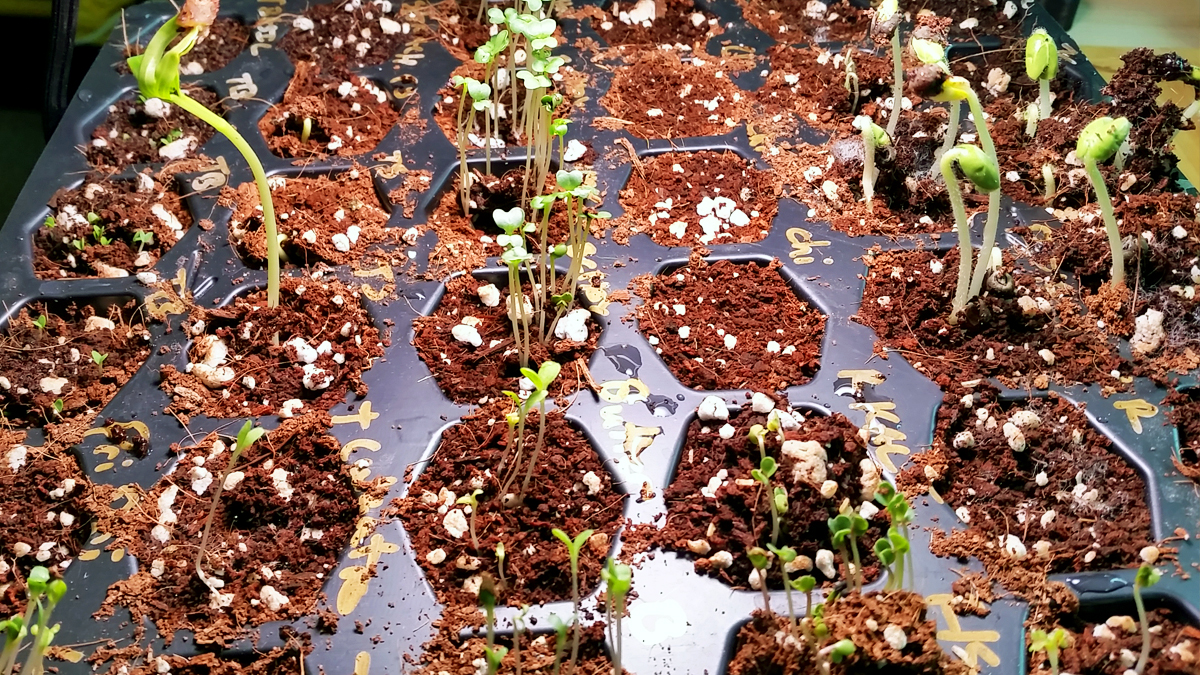
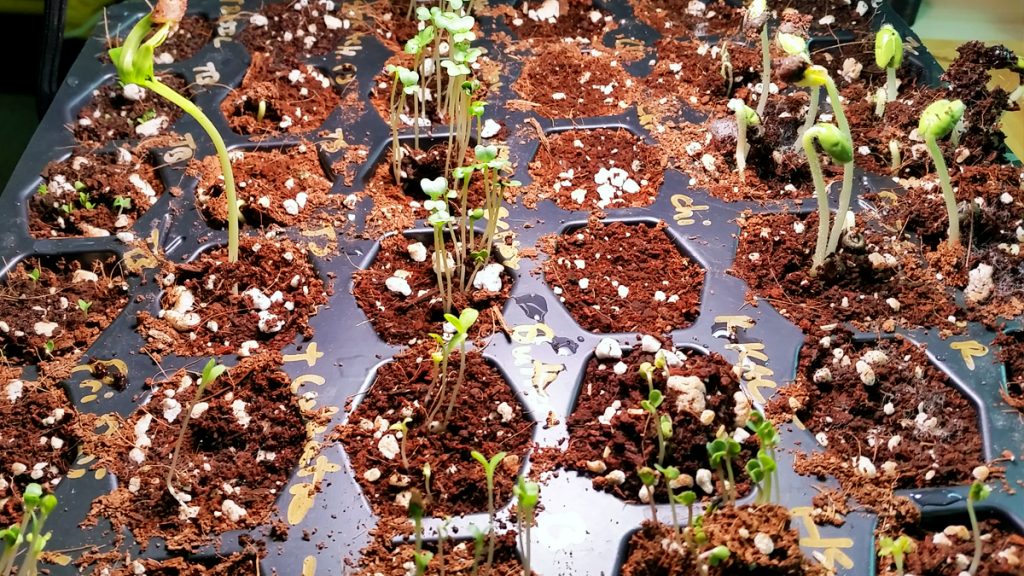
Fill each cell to within 3/8″ of the top, with the seed starting media.
Sow the seeds, and then cover them by filling the cells to the top with the seed starting media.
Water the cells, by misting them with a water bottle.
Place the seed starting cell tray, in the outer tray.
Add a little bit of water to the tray.
Cover the seed starting tray with the lid.
Place on a heat mat. (If you have one)
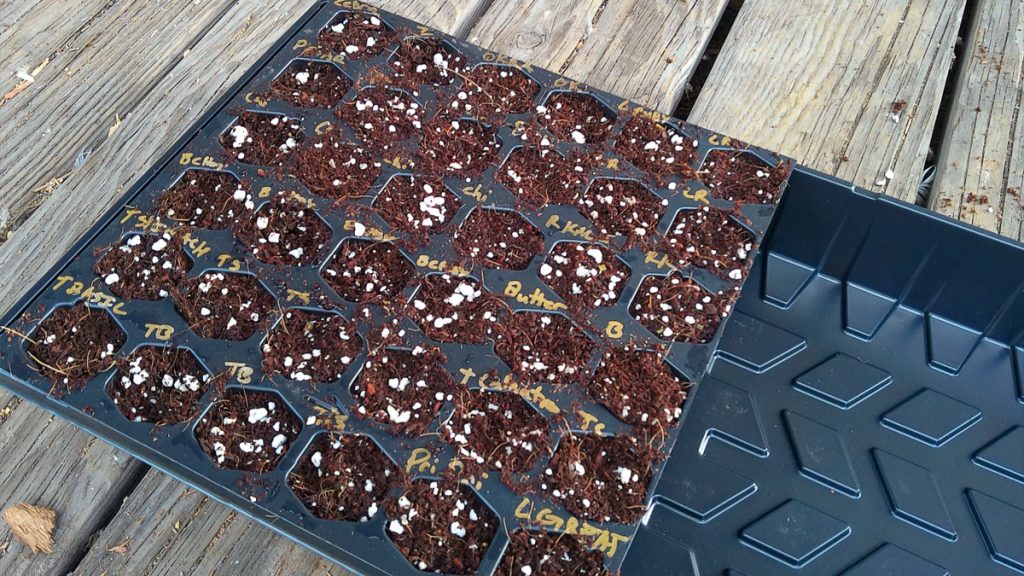
Seed trays filled with media, cells labeled, sown, and covered.
While it isn’t necessary, a heat mat (B00P7U259C) will improve germination rates. We always use them, and highly recommend them. Seeds also don’t need light to germinate, but once they have sprouted, they will grow spindly and weak without a strong source of light. So we also always use a grow light for seed starting.
Grow Out
Crack open the lid to partially ventilate the seedlings when the majority of seeds have sprouted.
When all the seeds have sprouted, fully uncover the seeds, but maintain a high moisture content by leaving water in the outer tray. Remove the heat mat.
After 48 hours, even most stubborn seeds will successfully germinate.
Carefully harden off the seedlings by gradually introducing them to sunlight outside. Start by leaving them outside in indirect sunlight for an increasing amount of time. Then slowly introduce them to filtered and then direct sunlight.
You will burn and cook seedlings if you introduce them to the sun’s strong UV rays too quickly.
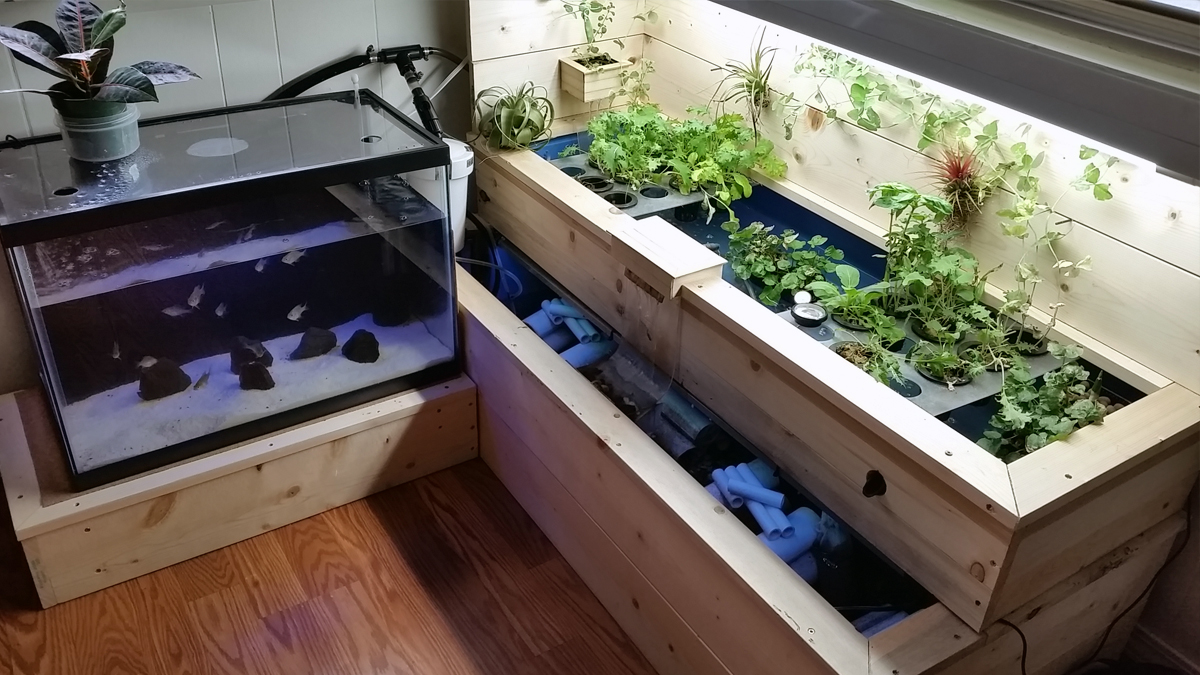
Hydroponic Starts
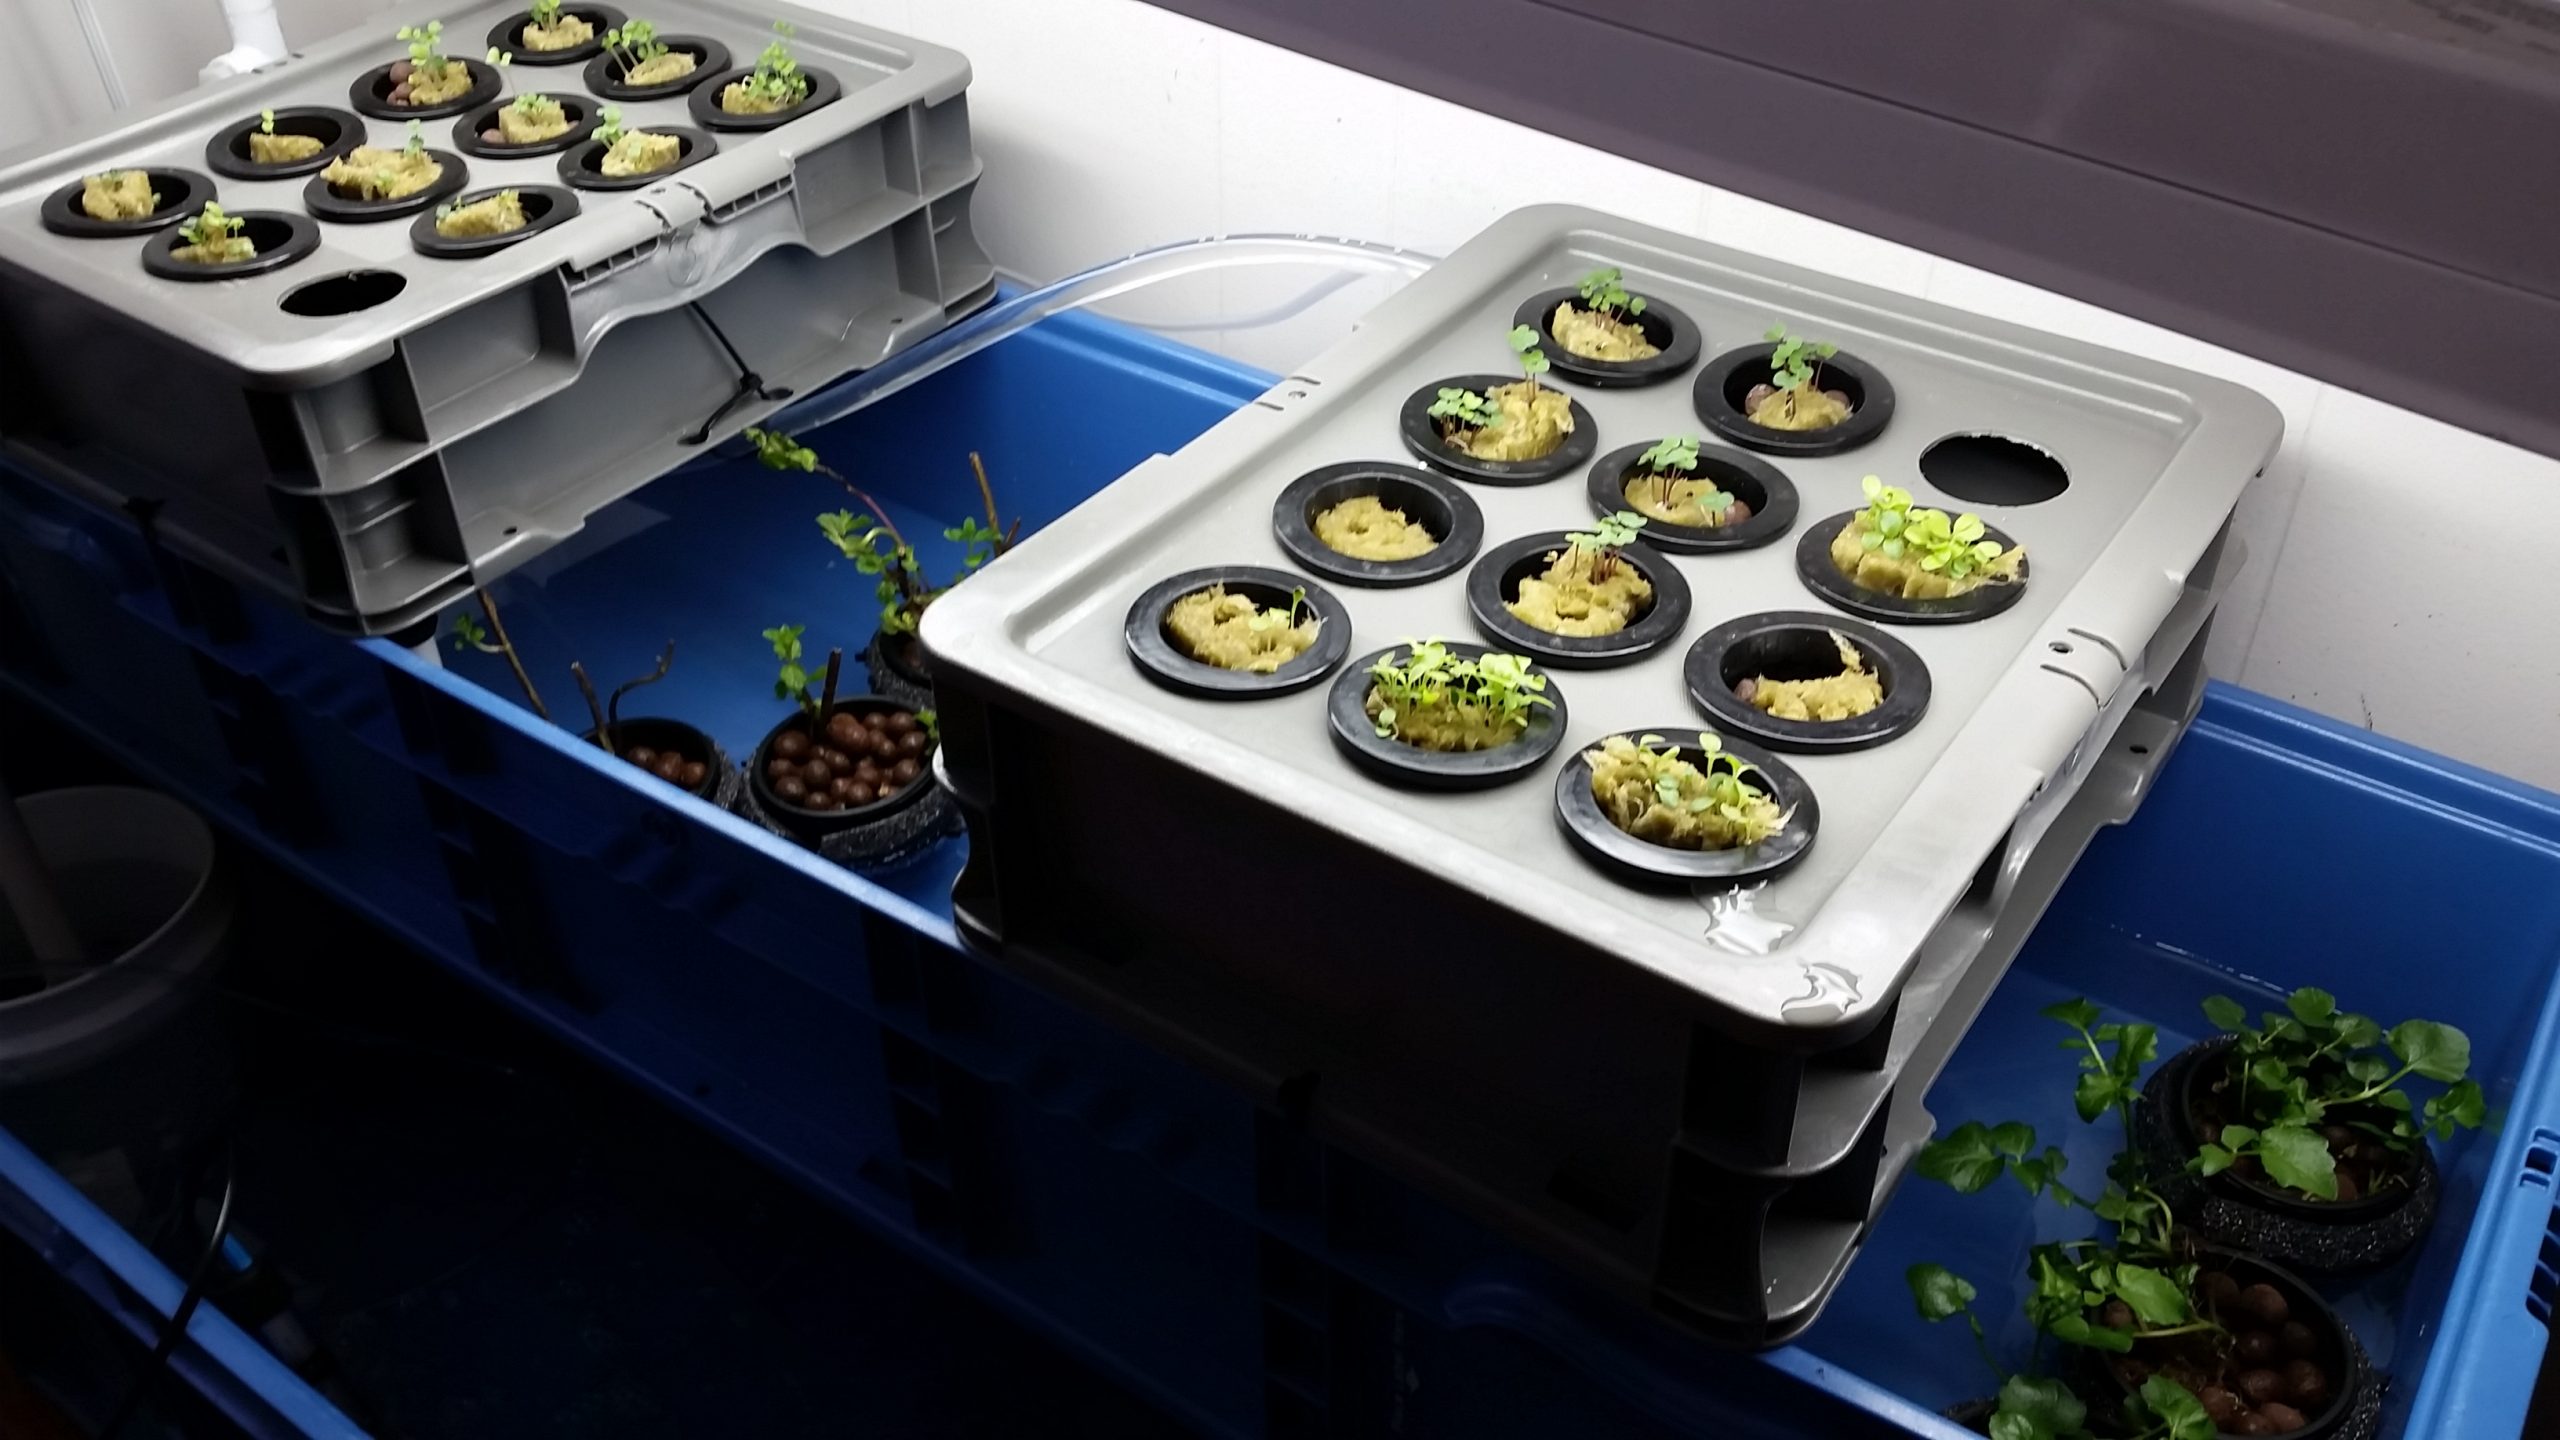
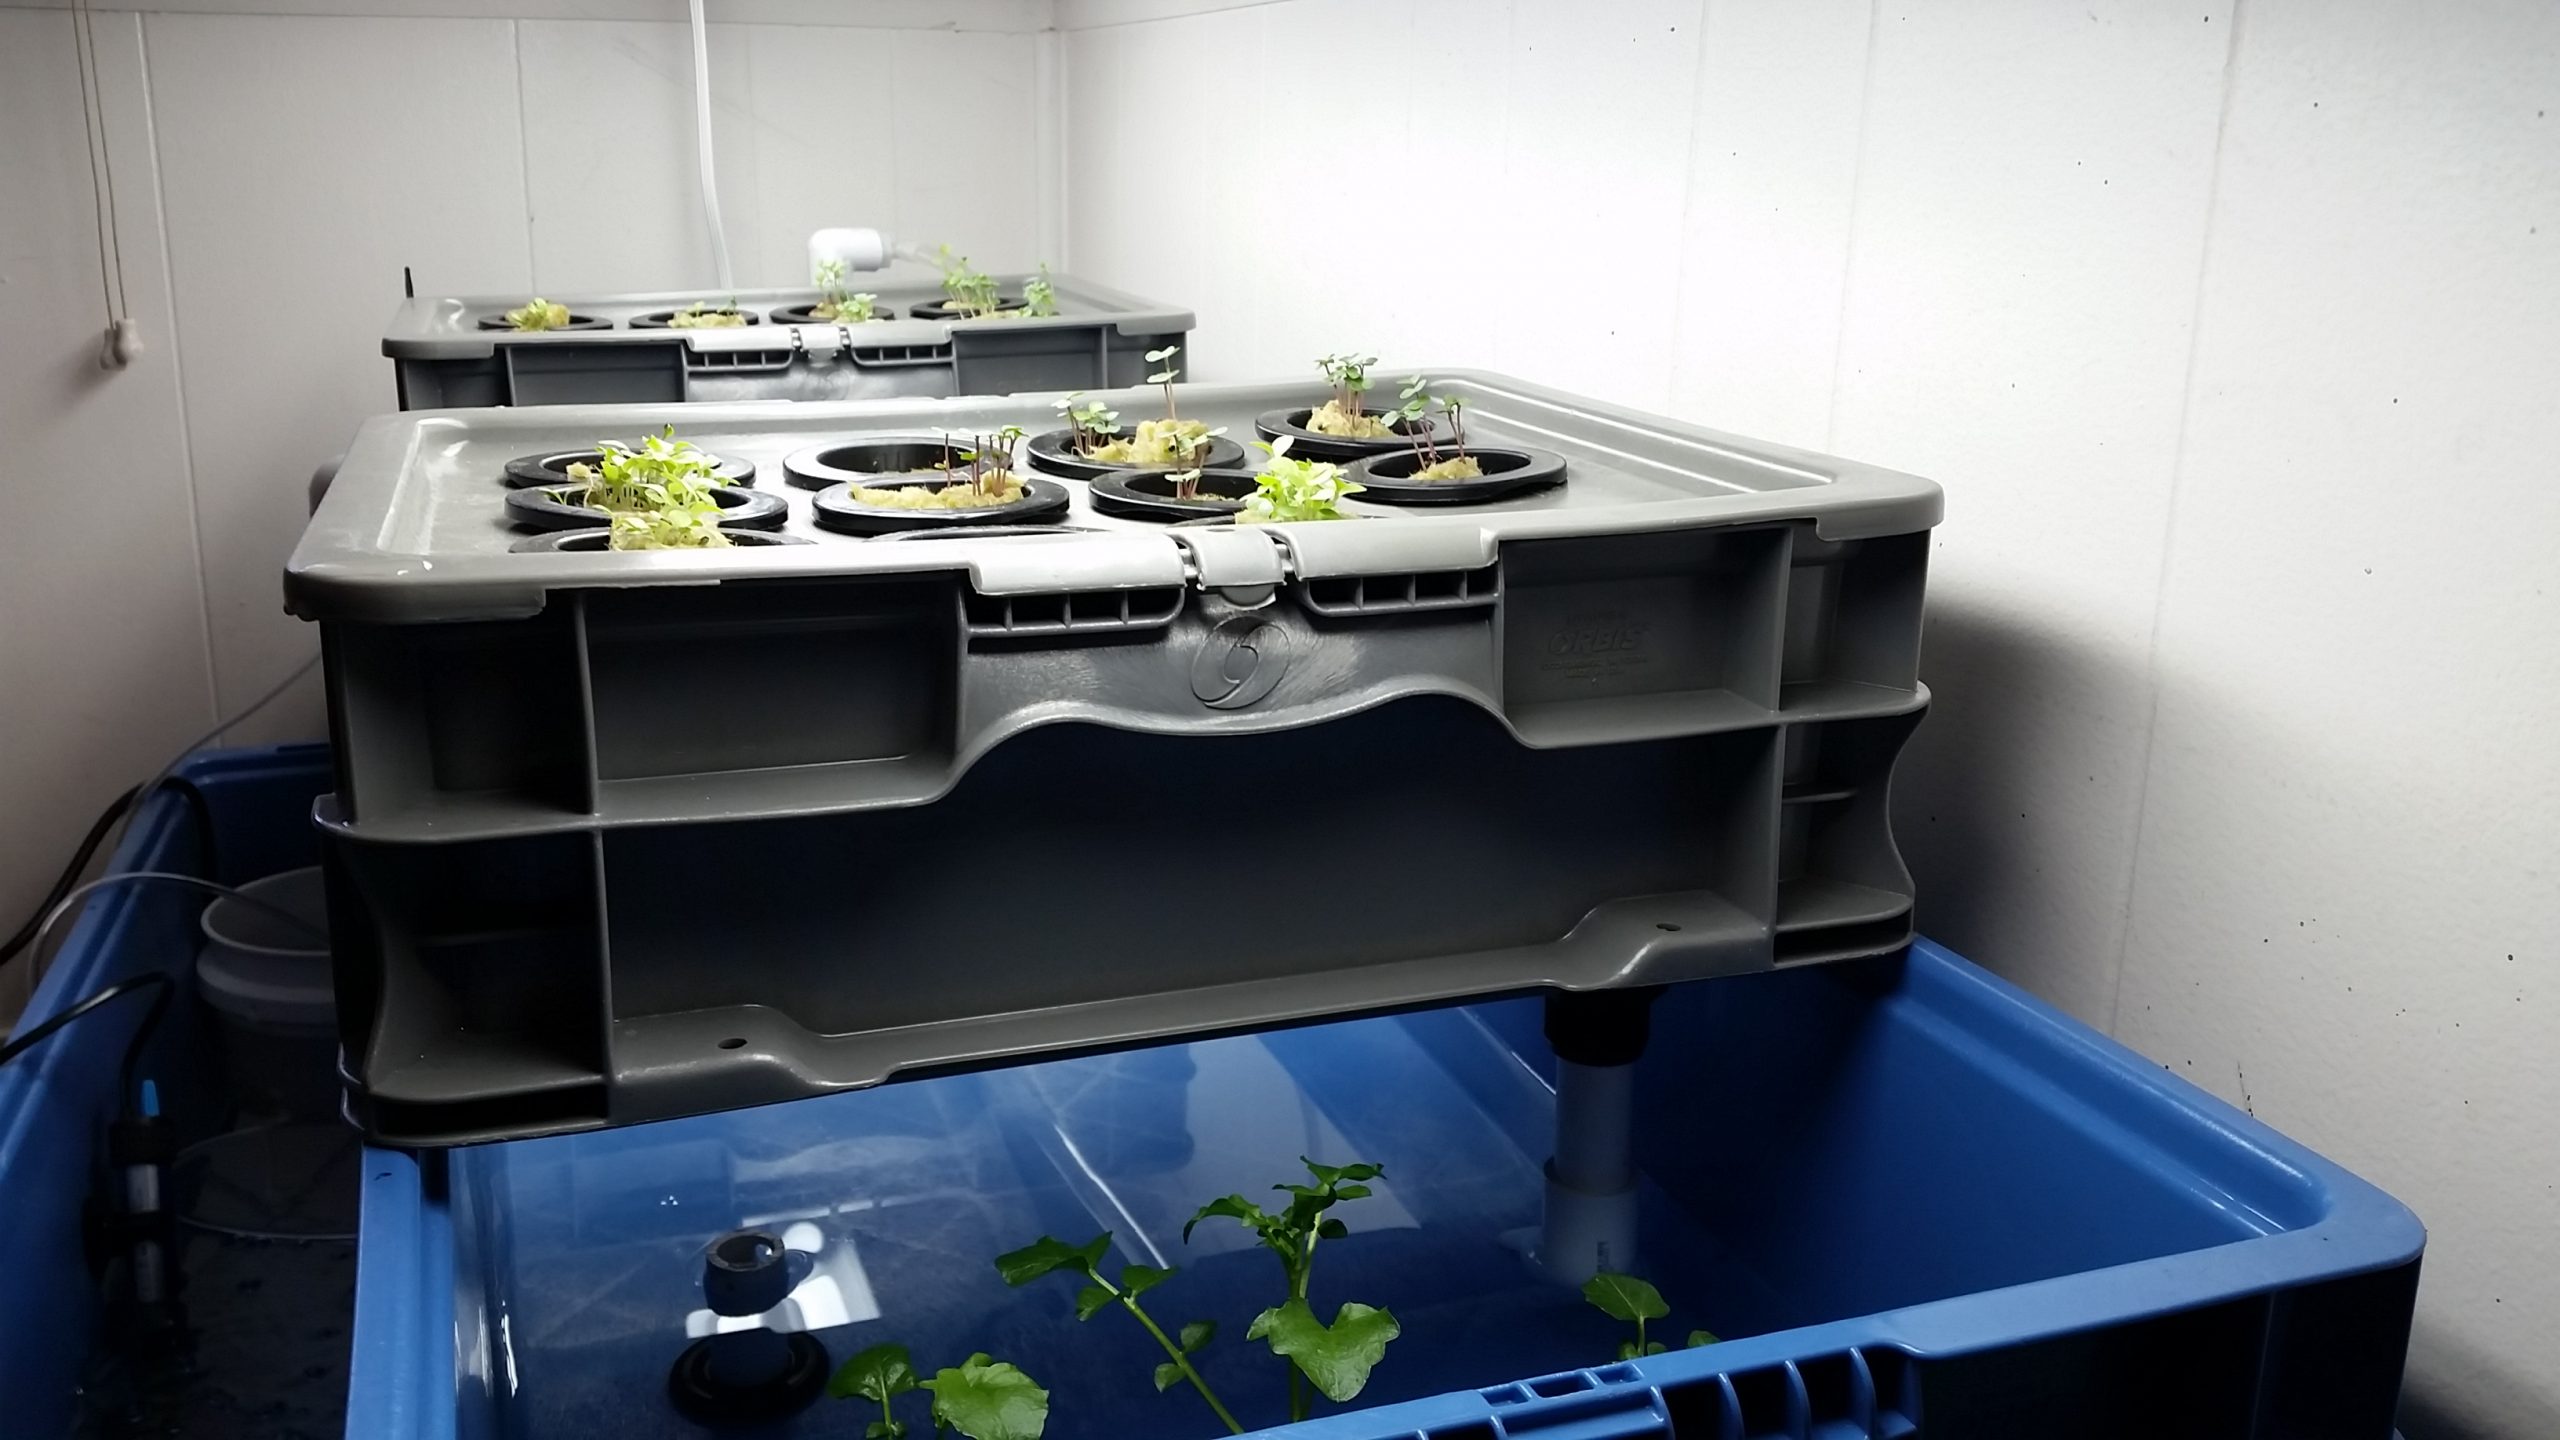
If you intend to start seedlings for an aquaponic system, Grodan rockwool is a great starting option.
Fill your outer tray, not the plant cell tray, with rockwool cubes, hydrate with water and a dilute hydroponic mixture, sow seeds, and treat the germination process the same as non-hydroponic seedlings.
Instead of transplanting into soil, you will be able to plant into clay pebbles, ebb flow beds, or even directly into net pots and rafts, depending on your aquaponic or hydroponic set up.
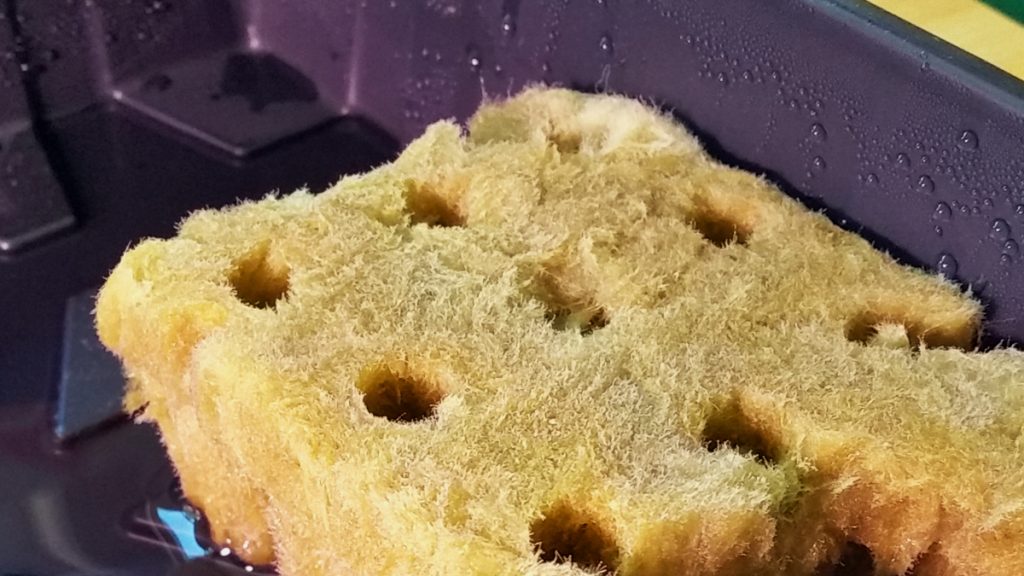
Sprouting In rockwool is super easy, and will allow you to plant into more hydroponic setups.